Before you can run an analysis, you need to select the documents it should cover. The Analyse button becomes active only after at least one document is selected.
Manual selection
- Click the checkbox in the upper-left corner of a document card to include it - a check mark confirms it's selected.
- Click Select All to include every document currently displayed in the project view.
Manual selection is usually quickest in smaller projects. In larger projects - roughly 10 or more documents - filters are typically the easier way to build a meaningful subset.
Filtering by document or respondent characteristics
Filtering requires that you've already created profiles in Data Context.
- Click Filters on the right side of the screen.
- Choose Document Filter or Respondent Filter.
- Select values across one or more characteristics (for example, Gender: male and Marital status: single) - each selection activates automatically.
- Click Apply.
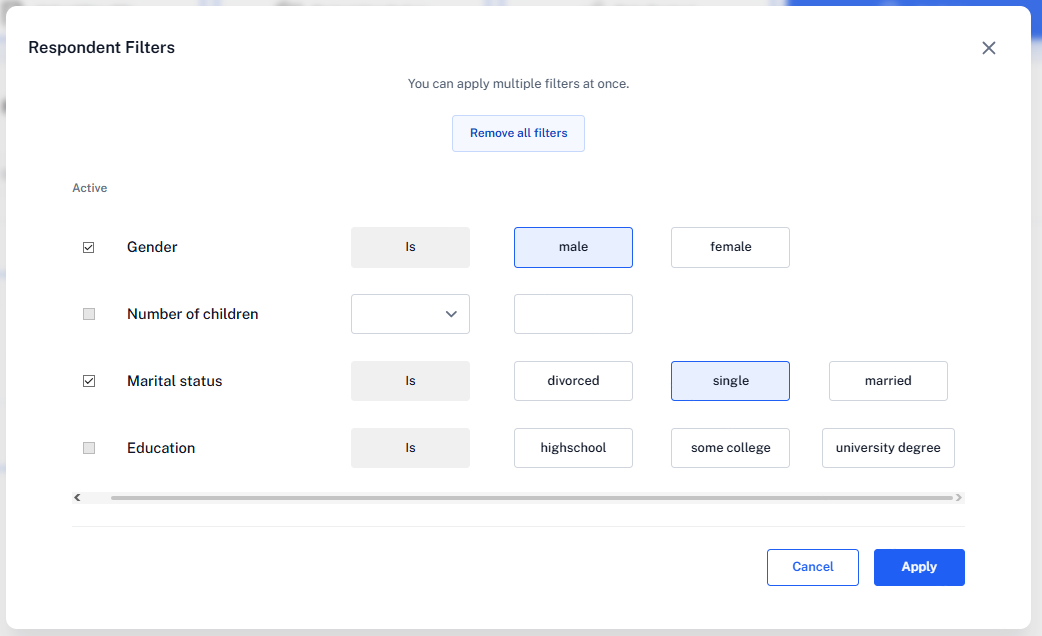
All documents that pass the filter remain in subsequent analyses; everything else is filtered out and hidden from view.
Filter options by data type
- Text or Boolean characteristics - choose from the values you've entered, or True/False.
- Number characteristics - choose is, different, less than, greater than, or from–to.
Viewing and removing active filters
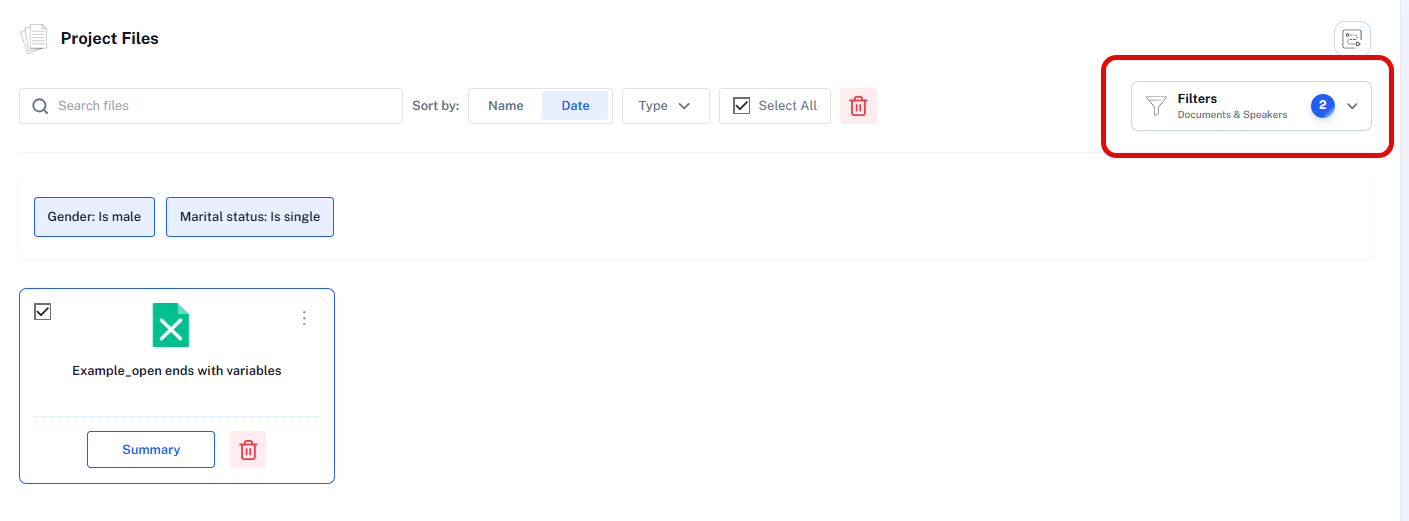
Active filters appear at the top of the document list and in any analysis you run, with a count shown in the Active Filters tab. To remove a filter, open Filters, choose the relevant filter type, click Remove all filters, and click Apply.
Spreadsheet-specific selection
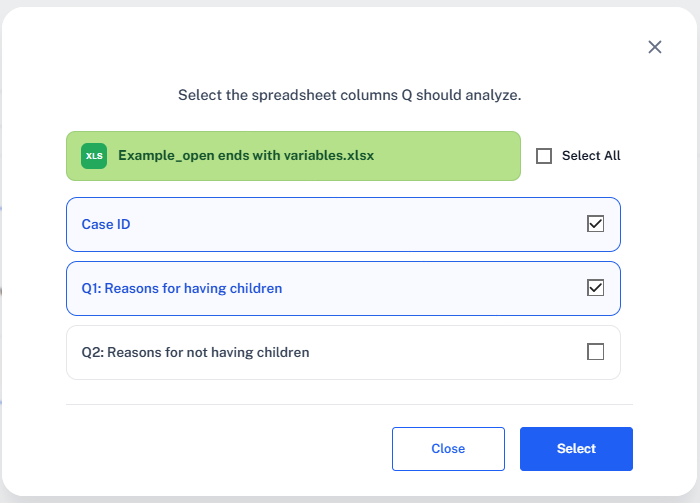
When you select an Excel file for analysis, QInsights asks which columns should be included - since it rarely makes sense to analyze every open-ended question together. Use the checkboxes to choose the text columns you want analyzed, or Select All where that makes sense. Including the Case ID column lets you reference case IDs when you ask for direct quotes.
Choosing all data vs. a subset
Querying a large dataset in one go (say, 30 interviews) tends to produce broader, more generalized answers - the AI prioritizes comprehensiveness over depth, and nuances can get diluted. Narrowing to a targeted, meaningful subset (4–6 interviews, or a filtered group matching specific criteria) usually produces more relevant, detailed, and pattern-aware answers. See Prompting Strategies for a fuller discussion and a recommended dialogic workflow: start broad, then narrow with filters as your questions get more specific.
Next steps
With documents and filters in place, move on to The Five Analysis Options to start exploring your data.