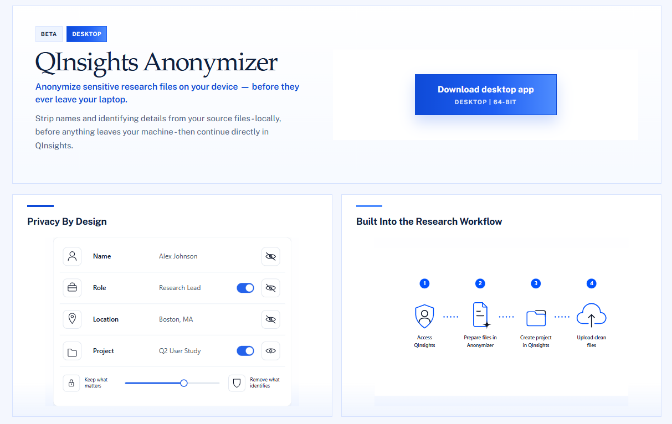
The QInsights Anonymizer is a free desktop app that runs entirely offline, on your own device. It is currently available for English, German, and Spanish, and is in beta for Windows Desktop only.
Why anonymize before upload
Under major privacy laws - including GDPR, CCPA, LGPD, PIPL, and APPI - processing participant data requires either informed consent or de-identification. The Anonymizer lets you clean your files locally before anything is uploaded, shared, or stored elsewhere.
The tool can identify up to 27 categories of personal and sensitive information, including:
- Person names, email addresses, phone numbers, postal addresses
- Organisations, job titles, educational institutions
- Social Security, passport, driving licence, account, and other ID numbers
- Age, ZIP/postal codes, vehicle identifiers
- Health conditions, ethnicity, religion, political views, sexual orientation
- Biometric and genetic data, trade union membership
- Unique events, rare characteristics, membership of small groups, family relationships
You stay in control of what gets anonymized and what stays - the tool proposes candidates, you confirm or override them.
Download the Anonymizer
- Within QInsights, click QInsights Anonymizer in the sidebar.
- Click Download desktop app.
- Windows may show a SmartScreen warning because the beta installer isn't yet signed with a commercial code-signing certificate. This is expected during the beta phase - the app runs locally and only processes files on your device. Click More info, then Run anyway to install.
Anonymizing your data
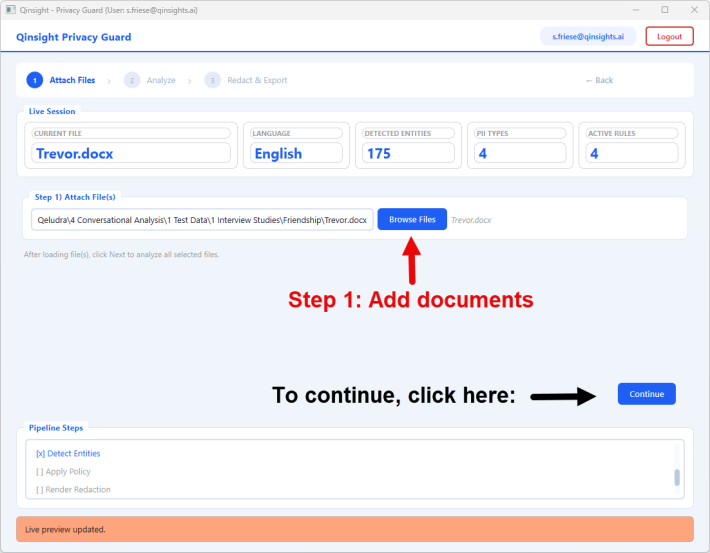
Step 1 - Add documents
Open the QInsights Privacy Guard app, click Browse Files to add the documents you want to anonymize, and click Continue.
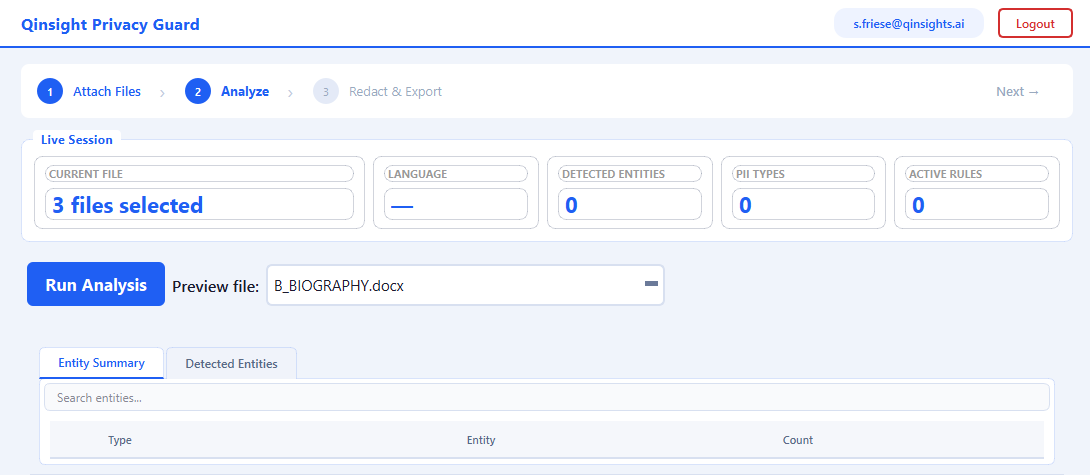
Step 2 - Select documents and run analysis
Select the document you want to analyze and click Run Analysis. The tool then lists candidate items for anonymization. Because the tool is still in beta, some items may be over-identified - you'll review and correct these in the next step.
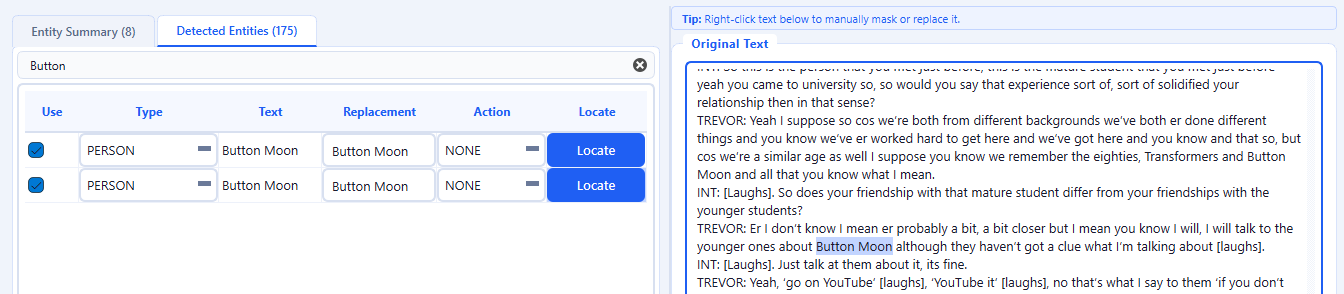
Step 3 - Check identified entities and adjust as needed
- Not masking an entity that was wrongly flagged: click Masked - it toggles to Visible.
- Changing a placeholder name (for example from
[Person 1]to a name of your choice): click Replace with and enter the new value. - Verifying a detected entity in context: open Detected Entities, search for the text, and click Locate to see it within the document before deciding whether to mask it.
- Changing the entity type: open Detected Entities, search for the text, and choose a new type from the dropdown. If the text appears multiple times, you'll be asked whether to apply the change to every occurrence.
Step 4 - Reduction
Once you've made all necessary changes, click Next: Reduction, then Run Reduction.
Step 5 - Save output and report
Click Save Output to save the redacted document under its original name with an _redacted suffix (for example Trevor_redacted.docx).
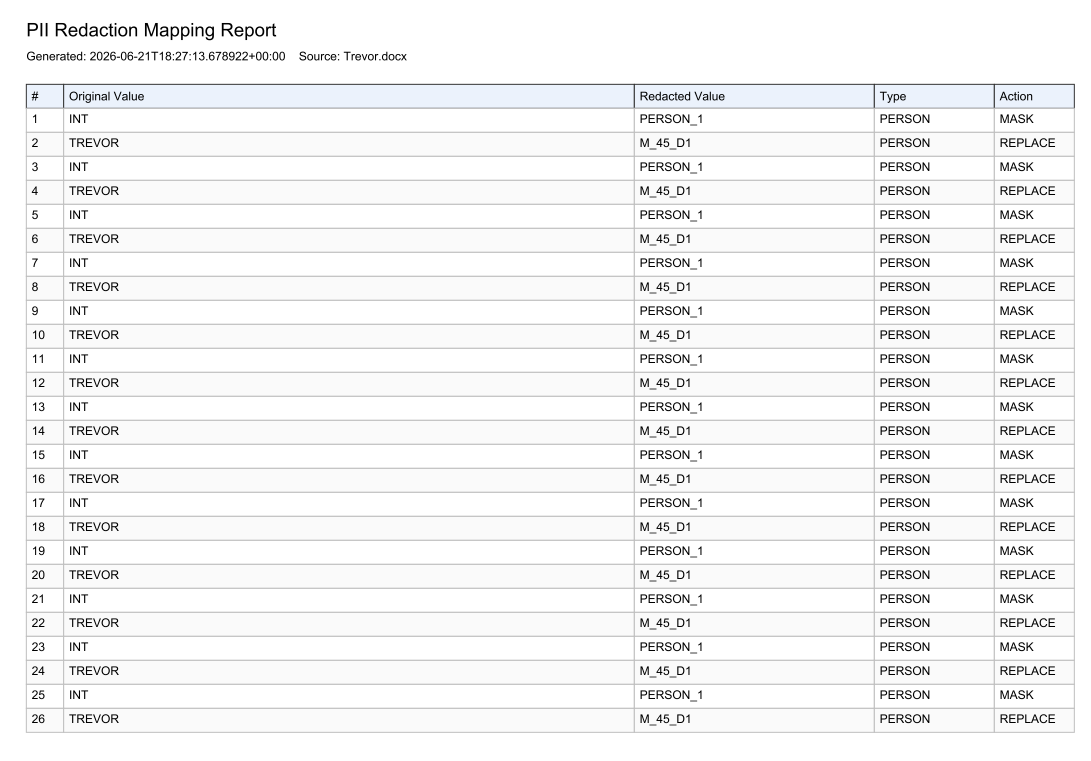
The accompanying report shows where each identified entity occurred and what it was replaced with.
Pseudonymization vs. anonymization. If you keep this report, the data is only pseudonymized - the replacements can still be traced back to the original identifiers. For true anonymization, delete the mapping report once you no longer need it, so the link to the original data no longer exists.
To work on the next document, click Back, select the next file from the dropdown, and repeat the process.
Continuing into QInsights
The Anonymizer is a preparation layer you access with your QInsights login credentials. Once your files are clean, create a project in QInsights and upload your clean files as usual.
This is a first beta release - feedback on what works and what you'd like to see changed will shape the next version of the tool.