
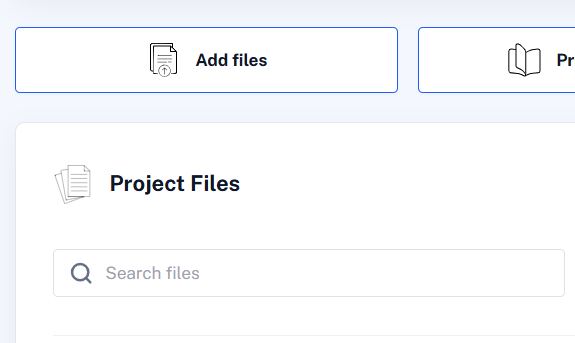
- To add files to your project, click on Add Files.
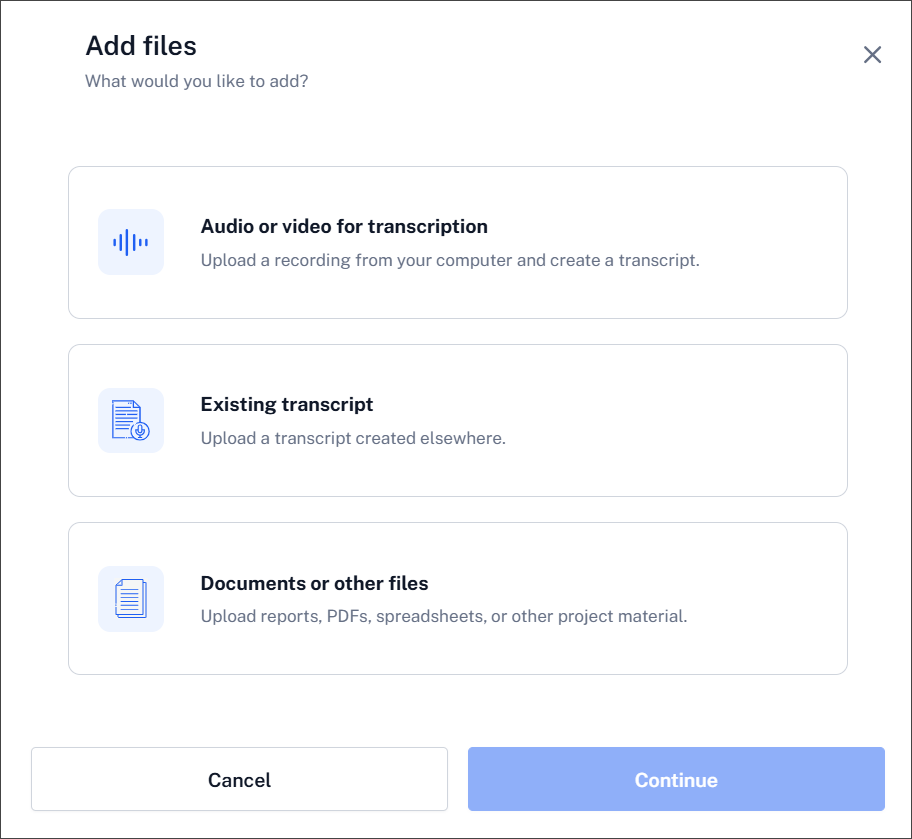
A screen appears where you can choose the type of material you want to add:
- Audio or video for transcription – Upload an audio or video recording from your computer. QInsights will create a transcript that can then be used for analysis.
- Existing transcript – Upload a transcript that has already been created elsewhere.
- Documents or other files – Upload other project material, such as reports, PDFs, spreadsheets, or text documents.
Select an option and click Continue. The next step will show the upload options relevant to the type of file you selected.
Option 1: Adding Audio or Video for Transcription
QInsights can transcribe audio files directly, so you can work with spoken data — interviews, focus groups, recorded conversations — without needing to prepare a transcript in advance.
When selecting the first option: Audio or video for transcription, you see the following screen:
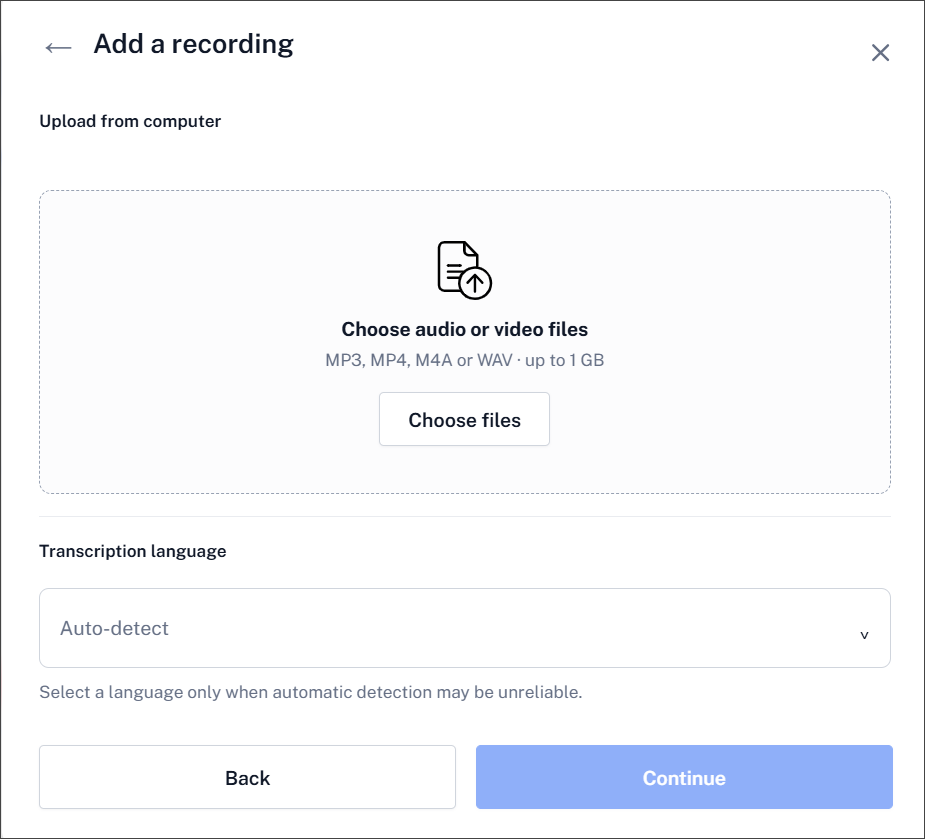
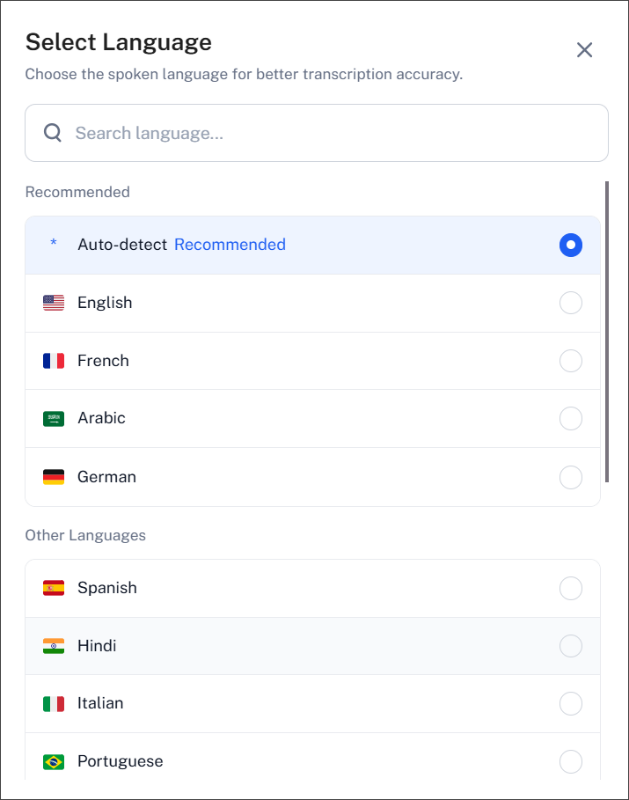
By default, Auto-detect is selected and the spoken language is detected automatically. If the transcription is not sufficiently accurate, try transcribing the file again and select the spoken language manually from the 18 supported languages.
Once you selected a recording and click on Continue, the Custom Dictionary dialog opens before transcription begins.
Add Terms to a Dictionary to Improve Accuracy (optional)
Before transcription begins, you can add custom terms like company or brand names, acronyms, medical or other specific domain specific terms, so that the transcription tool will spell it correctly.
You can add single terms one by one by entering a term into the editor and then click on Add terms.
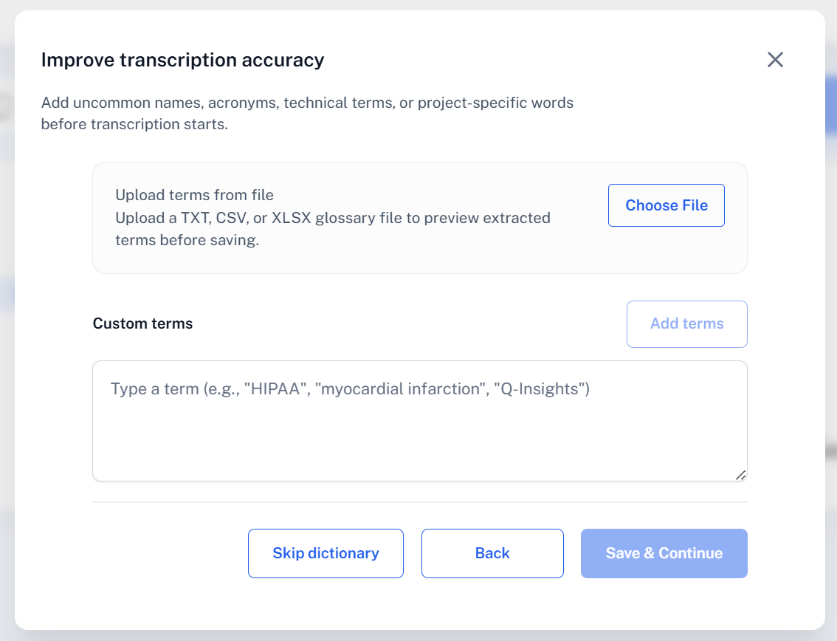
Or you can prepare a Text or Excel file with a list of terms, one terms per line. After preparing such a file, click on Choose File to add it to the dictionary.
If you do not want to enter any terms, simple click on Skip dictionary.
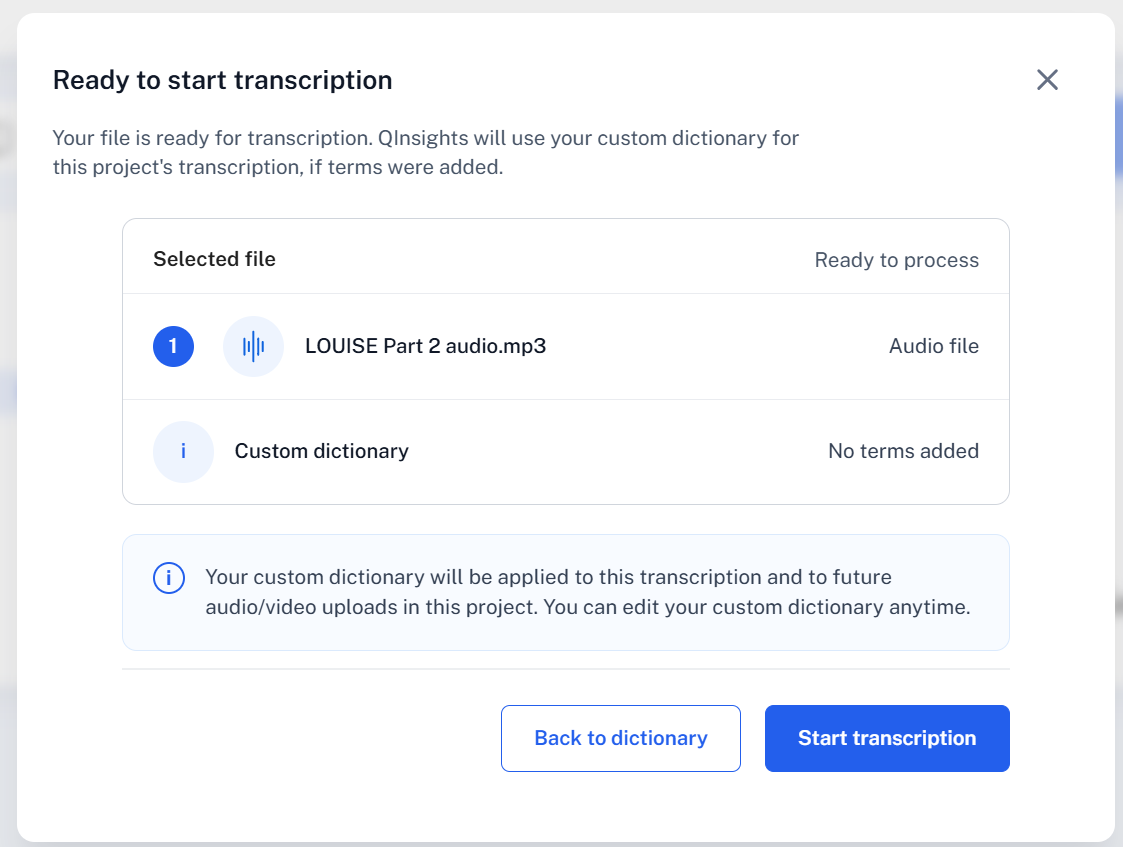
In all cases, you will see this screen next - providing an overview of the selected files and whether you have added dictionary terms.
- Click on Start transcription.
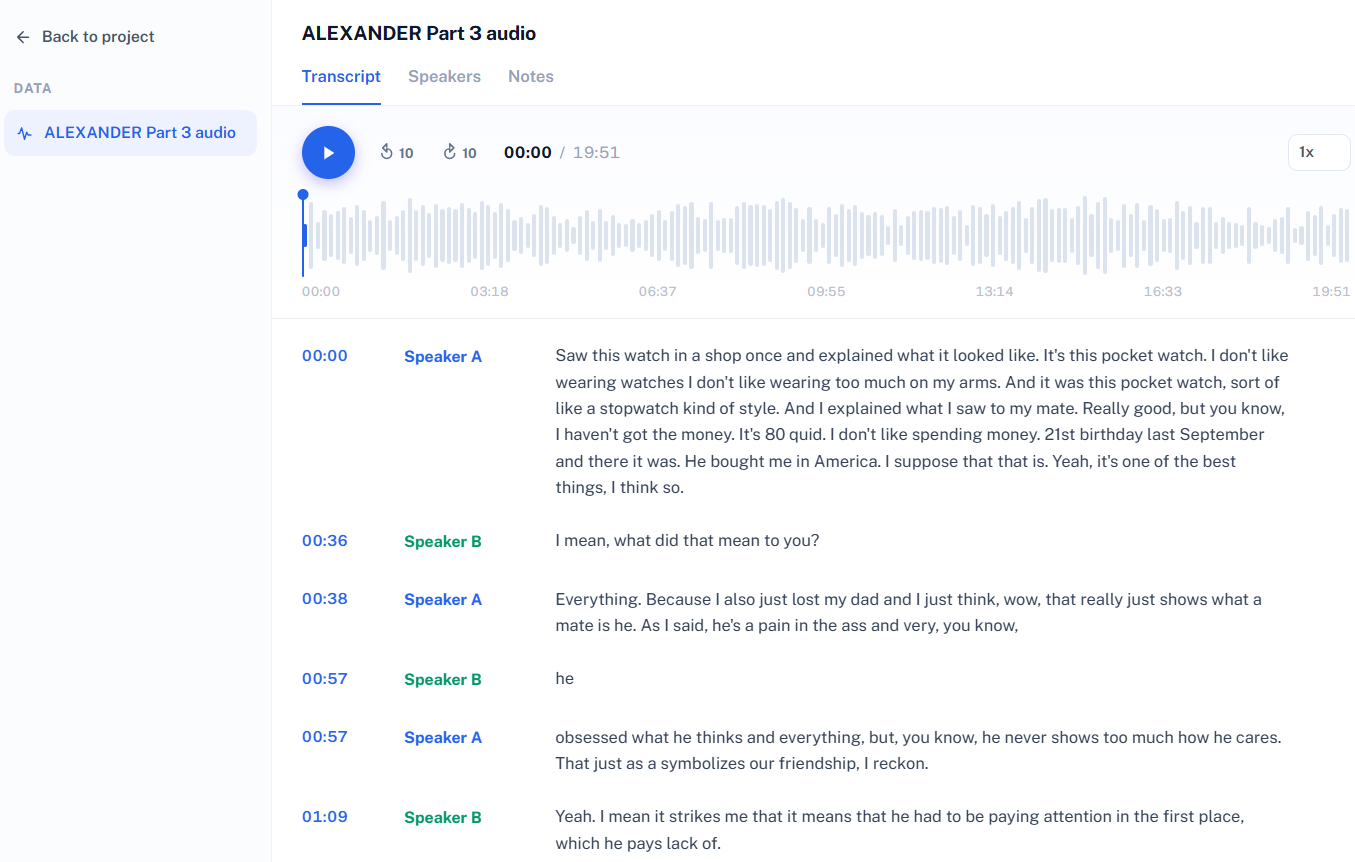
When the transcription is completed, the transcript opens in Edit mode
Editing Transcripts Created in QInsights
You can now check and modify the transcript if necessary and adjust the speaker names:
Adjusting speaker names
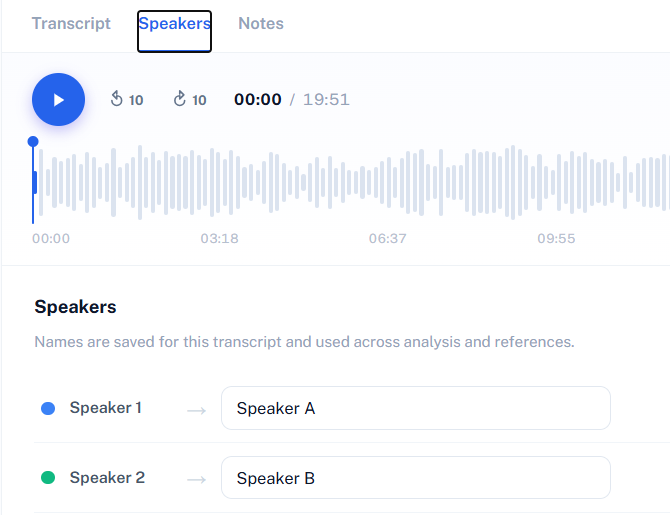
During transcription, speakers are assigned generic labels such as Speaker A, Speaker B, Speaker C, and so on. Once the transcript is complete, you can identify the individual speakers and rename them accordingly. For example, you can distinguish between Interviewer and Respondent, use participants’ names where appropriate, or assign pseudonyms to maintain anonymity.
- Either click on the name of the speaker in the transcript, or click on the Speakers tab:
After you have adjusted the speaker names, and go back to your project, the Data Context window opens:
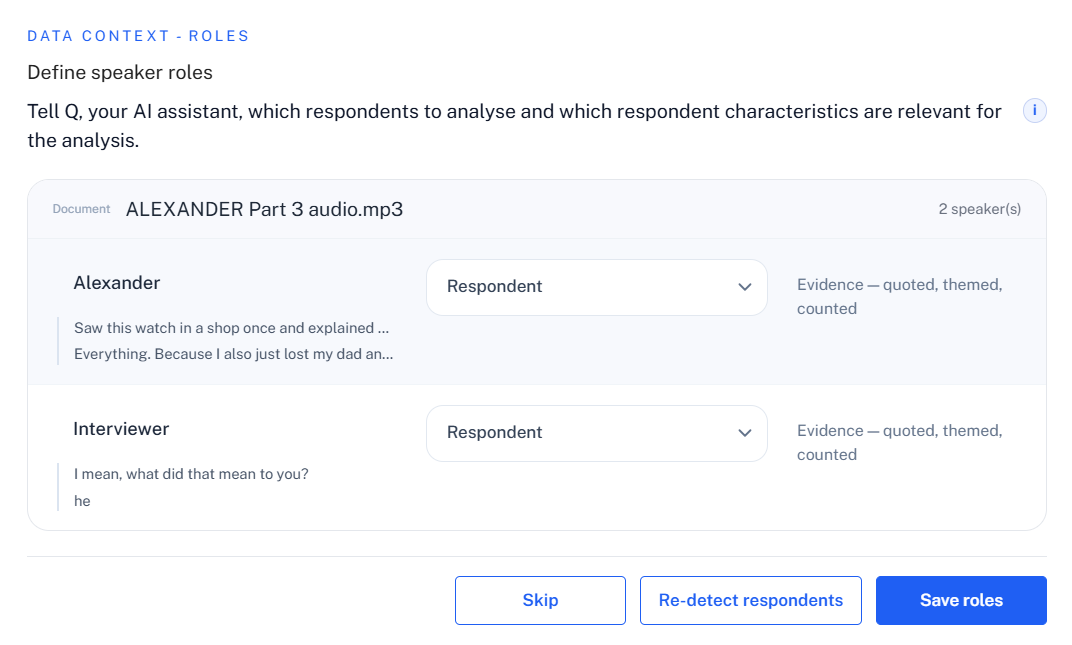
Here you can define the roles (respondent or interviewer). For more detail, see Data Context.
Correcting transcripts
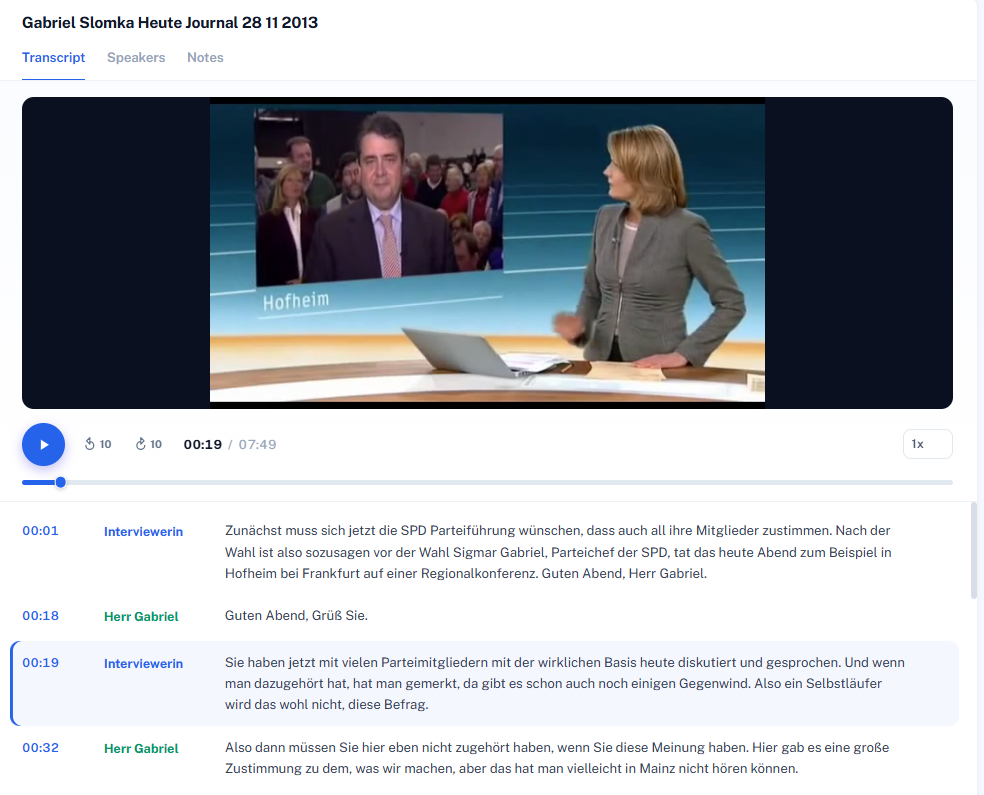
- Click on a time mark to listen to the corresponding text. Double-click inside the text to edit it:
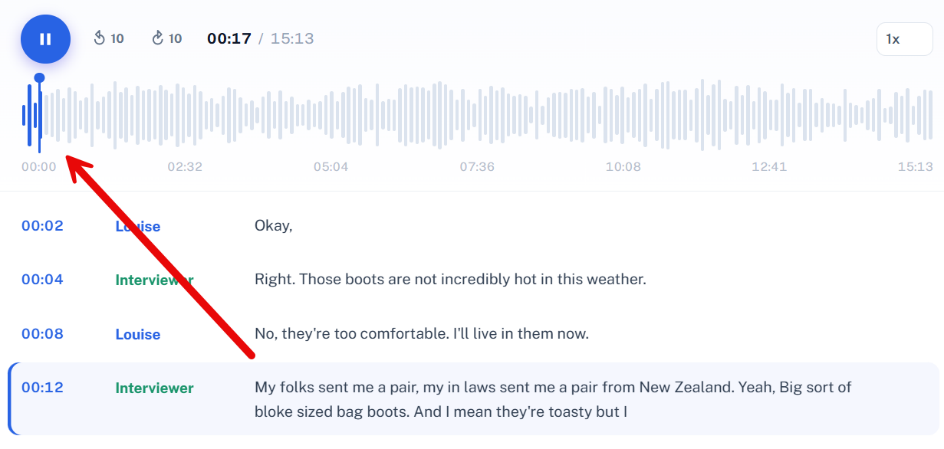
Further Options
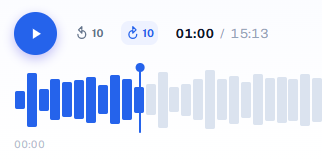
The 10-second controls let you move quickly through the recording while reviewing the transcript:
- ↶ 10 jumps 10 seconds back — useful when you want to replay a passage you did not hear clearly or check the transcription against the audio.
- ↷ 10 jumps 10 seconds forward — useful for skipping ahead without dragging the position marker on the waveform.
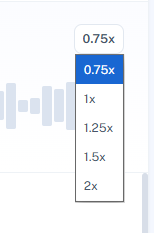
Use the playback speed menu to adjust how quickly the recording is played. Available speeds range from 0.75× to 2×.
Slower playback can help when reviewing difficult or unclear passages, while faster playback is useful when checking longer sections of the transcript.
Example video transcript:
Reviewing and editing transcripts
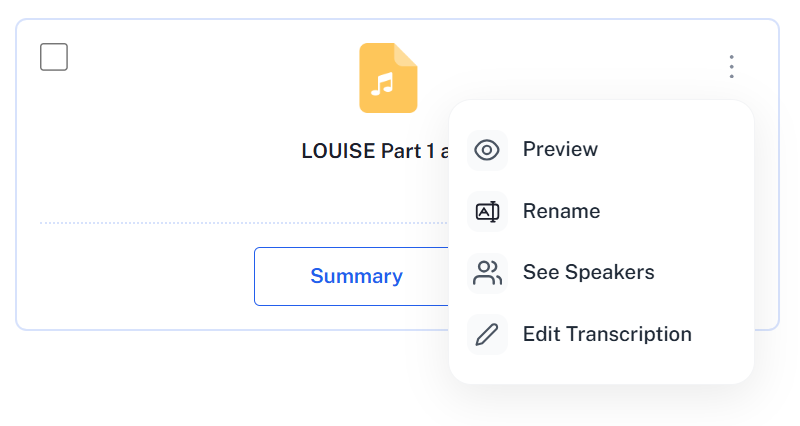
When the transcription has been completed, you can access several options by clicking the three-dot menu on the document card:
Option | What it does |
Preview | Opens a read-only view of the transcript. |
Rename | Within QInsights, you may want give your document a different name that better fits your analysis needs. |
See Speakers | Shows a list of the detected speakers. |
Edit | Opens the transcript including the multimedia file, so you can review and if needed correct the text. You can also change the name of the speakers. |
Option 2: Adding Transcripts Created Elsewhere
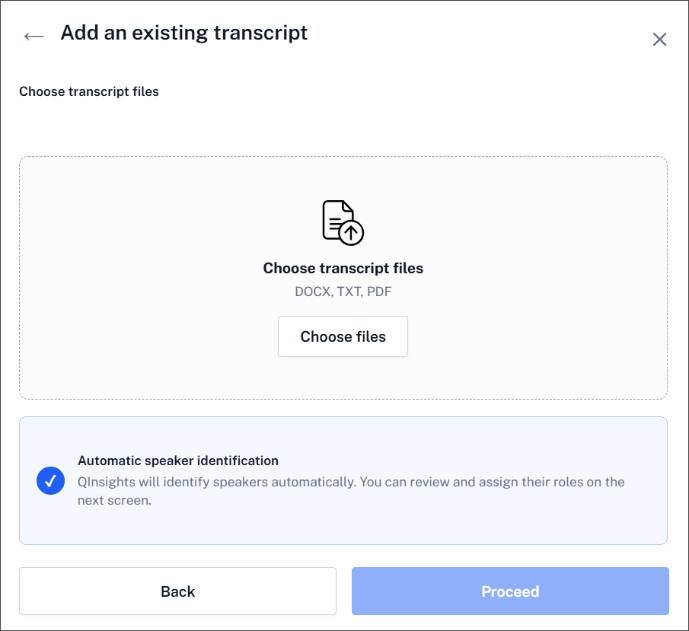
- When adding transcripts prepared elsewhere, select the option Existing Transcripts / Continue.
- Choose one or more files in Docx, TXT or PDF format and click Proceed.
For existing transcripts, automatic speaker identification is applied during upload. Speakers are detected and separated automatically.
It will take a few minutes for the documents to be processed. It is not a simple upload. At this stage the documents are prepared for optimal analysis with AI.
Once this process is finished, the Data Context panel opens. Here you assign a role to each detected speaker so that QInsights knows how to treat their contributions during analysis.
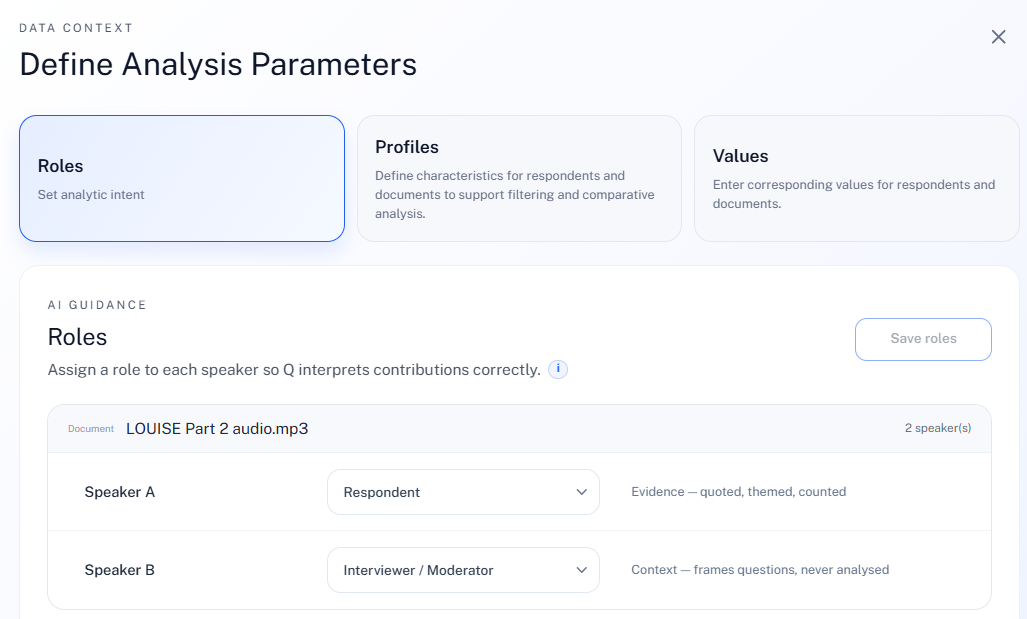
Three roles are available:
- Respondent — the speaker's text is treated as primary data and is available for quoting, theming, and counting.
- Interviewer / Moderator — the speaker's text is retained as contextual background but is not analysed as data.
- Exclude — the speaker's contributions are removed from analysis entirely. This is useful for, say, a brief exchange with someone who walked into the room mid-recording.
Once you have assigned roles, click Save Roles. You can then close the panel or continue to the Profiles tab to enter characteristics for your respondents. See Data Context for details.
Data Context helps you define how QInsights should understand and organise your data before analysis. It allows you to assign speaker roles, create characteristics for speakers or documents, and enter the corresponding values. This provides important context for the AI and supports more precise comparisons, filtering, and interpretation.
Option 3a: Adding Word or PDF Files
Use this option for Word or PDF files that are not transcripts. These may include, for example, reports, observational notes, policy documents, newspaper articles, journal articles, or other textual project material.
Word and PDF files can be uploaded together in the same upload.
Option 3b: Adding an Excel File
Excel files are uploaded through the same Documents or other files option. However, Excel files need to be uploaded separately from Word and PDF files because they require an additional processing step.
Unlike Word and PDF documents, an Excel file contains structured data organised in columns. Before the file is processed, you therefore need to specify how the individual columns should be treated.
After uploading an Excel file, the Select Excel columns window opens. Here you specify which columns contain contextual or descriptive variables and which columns contain the text to be analysed. This distinction allows QInsights to separate contextual or descriptive variables from the qualitative text that will be used for the analysis.
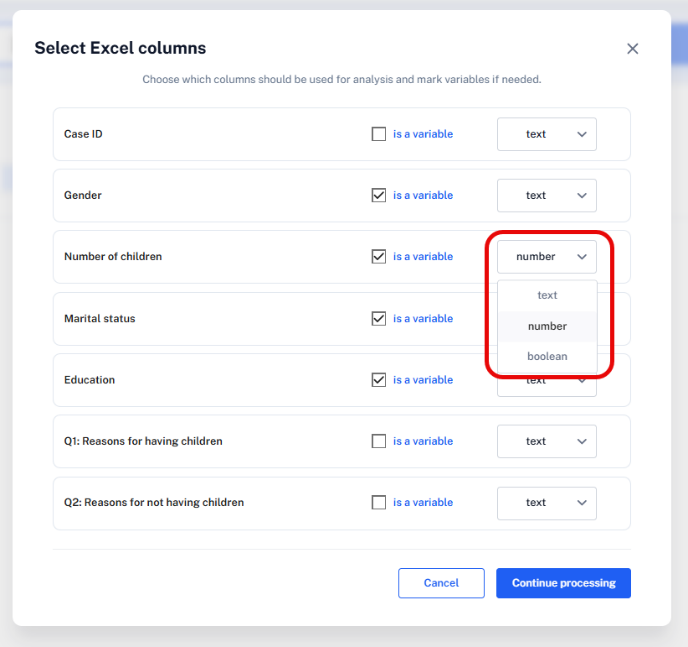
In the example above, Gender, Number of children, Marital status and Education are defined as variables, while the responses to the two open-ended questions are treated as text for analysis.
- For each column, decide whether it should be added to the Data Context as a variable (see Create Profiles for further details).
Select ‘is a variable’ for columns that contain background information, identifiers, ratings, or other metadata that you may want to use later for filtering, comparison, or subgroup analysis.
Examples of columns often added as variables include gender, age, education, marital status, and number of children.
Columns containing the actual text to be analysed—such as responses to open-ended questions, review text, comments, or feedback—should NOT be marked as variables.
- For each selected variable, specify the appropriate data type:
- Text for categories or labels
- Number for numeric values
- Boolean for values with two possible states
- After making your selections, click Continue Processing.
In practice, we recommend creating a separate project for survey data stored in Excel files. Excel data are processed differently from Word, PDF, audio, or video files and cannot be combined with these other file types in a single analysis.
Keeping Excel-based survey data in a separate project also helps keep the Data Context manageable. Any columns you select as variables during processing are added to the Data Context. If a spreadsheet contains many variables, the Data Context can therefore become quite extensive.
If, after adding the data to your project, you are curious how the data is stored in the Data Context:
- Click on Data Context / Values Respondents.
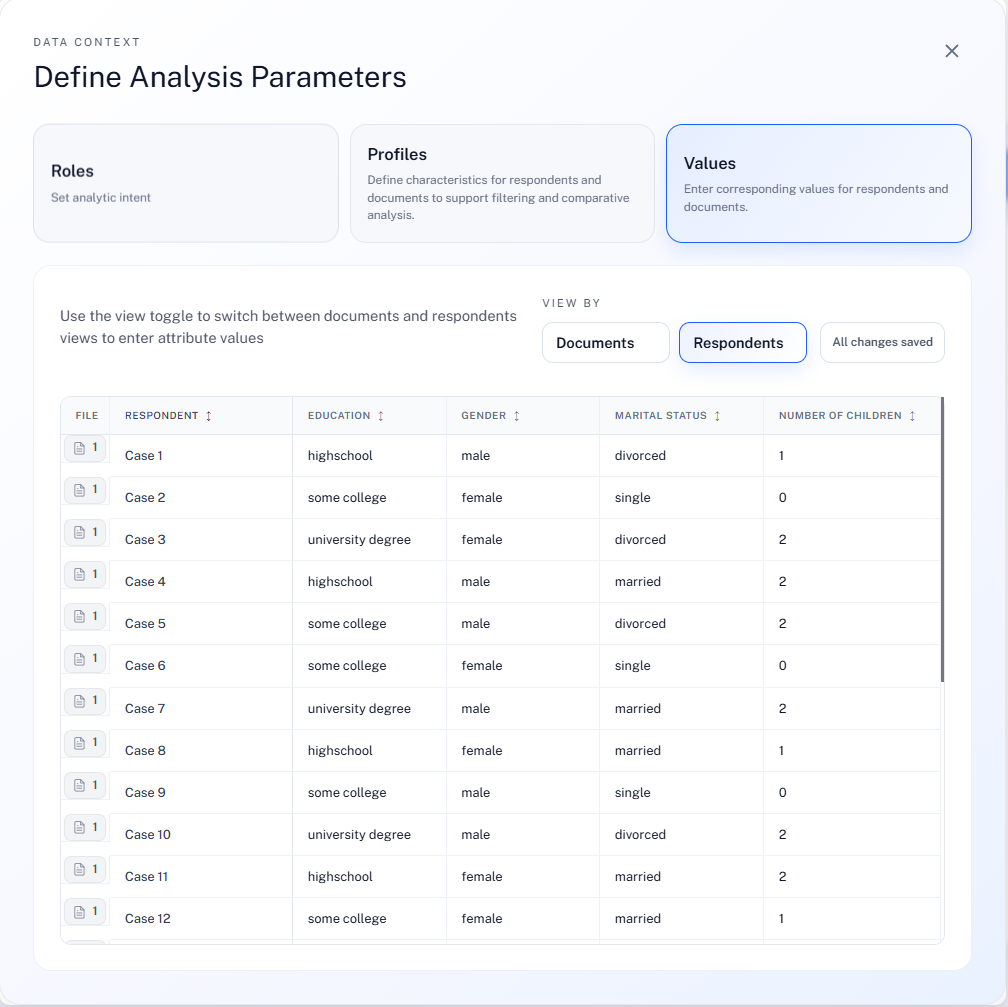
This is how you can make use of respondent profile data in the various analysis options:
In Conversational Analysis, subgroup analysis is the most flexible. You can refer directly to profile data in your prompt, for example by asking about responses from women, younger participants, or respondents with a certain rating. QInsights can then use this contextual information to focus the analysis on the subgroup you specify.
For Sentiment Analysis, subgroup exploration is often most useful in a follow-up chat, where you can ask more targeted questions about specific respondent groups or profile characteristics.
For Topic Analysis, respondent filters set in advance are recognised during the analysis. This allows you to run the analysis on a defined subset of the Excel data (see Working with Filters).