
Selecting Documents for Analysis
Before you can start an analysis, you need to select the documents that should be included. The Analyse button becomes active only after at least one document has been selected.
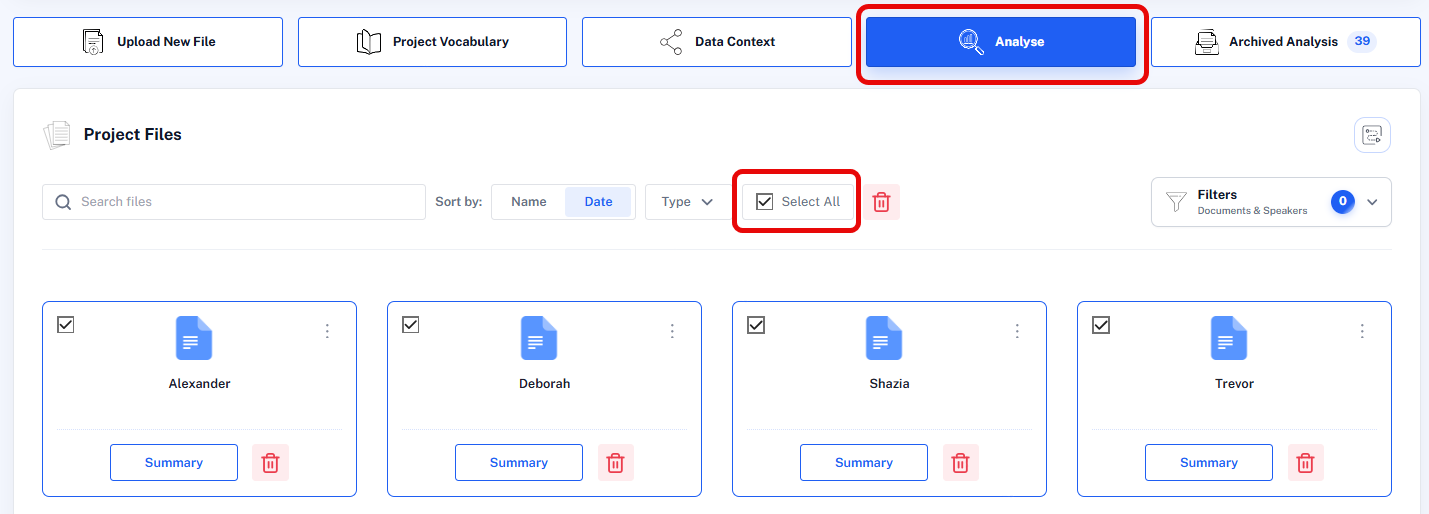
- To select individual documents, click the small checkbox in the upper-left corner of each document card. A check mark indicates that the document is included in the analysis.
- If you want to include all documents currently displayed in the project view, click Select All.
Another way to define the set of documents for analysis is by using Filter. This is especially useful in larger projects. When working with 10 or more documents, filters are often the easier way to create a meaningful subset. In smaller projects, manual selection is usually quicker (see Setting Profile Data as Filters for further detail).
Use manual selection when you want to choose a few specific files directly. Use filters when you want to include documents based on shared characteristics, such as document type, profile data, or another defined subset.
Specifics when Analysing Spreadsheets Data
When you select an Excel file for analysis, QInsights asks you to select which columns should be included in the analysis:
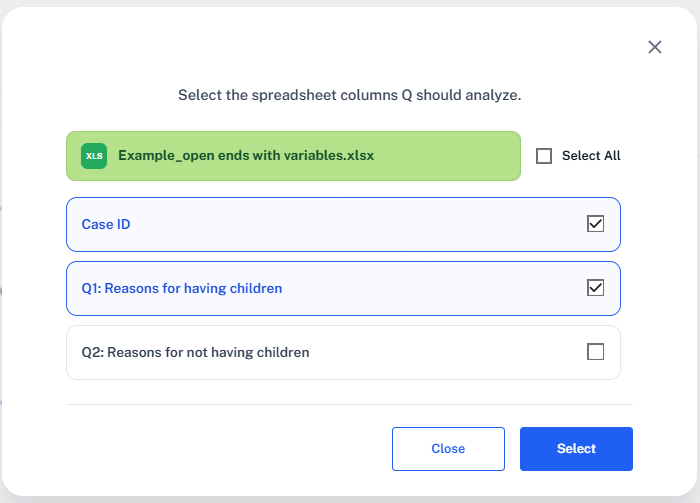
This step is necessary because it often does not make sense to analyse all columns, e.g. al answers to open-ended questions together.
You see the available data columns for the selected Excel file.
- Use the checkboxes to choose the columns that contain the text you want to analyse.
You can select individual columns or use Select All where it makes sense to include all available text columns at once. Adding the Case ID column to the analysis allows you to include the case ID as reference if you ask for direct quotes.
- After making your selection, click Select to continue with the analysis.
Working with Filters
To set one or multiple profile characteristics as filter:
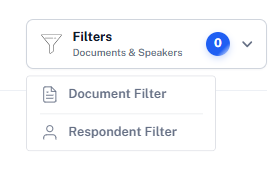
- Navigate to the Filter button on the right-hand side of the screen to set a filter.
- Select either Document or Speaker Filter.
Next a window opens listing the available profile characteristics:
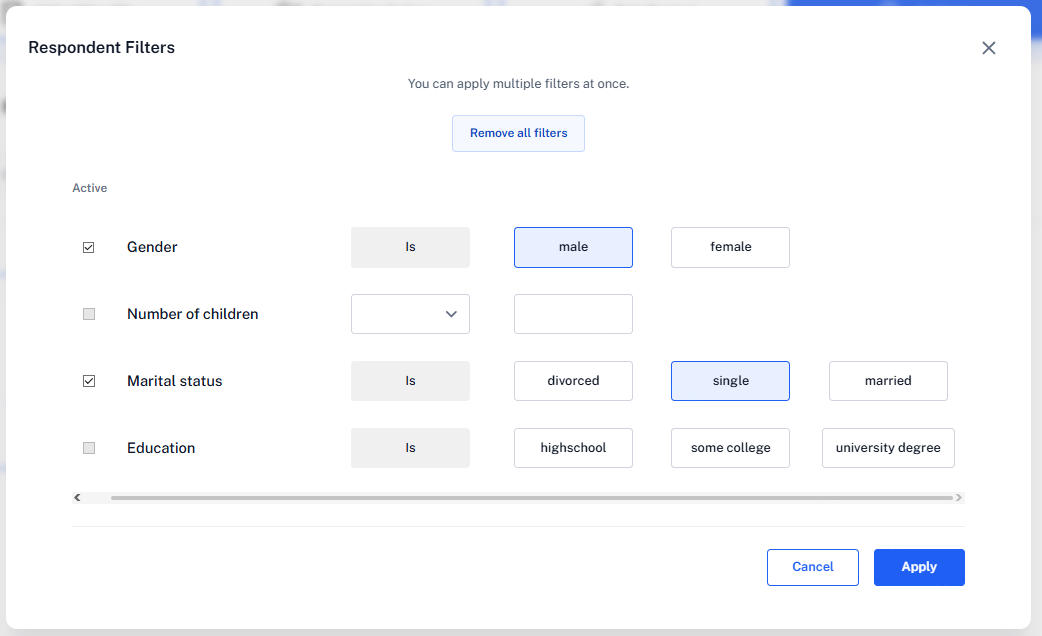
You can select values of multiple characteristics like Gender and Marital status: men & single as shown in the screenshot.
- Make your selection. The selected characteristic is activated automatically.
- Next click Apply.
All documents that pass the filter will remain in the subsequent analyses, all others will be filtered out and hidden from view.
When setting a characteristic of type text, all values that you entered will be shown.
When setting a characteristic of type text or Boolean as filter, the options are True or False.
When you select a characteristic of type number, you can select the following options:
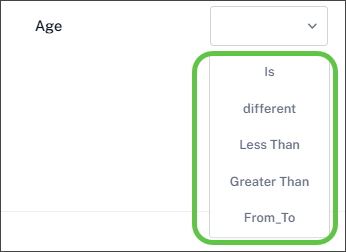
- is / different / less than / greater than / From_To
Display of Active Filters
The filter that has been applied is displayed at the top of the documents list in your project and in any analysis that you now run. The number of filters that have been applied is displayed in the Active Filters tab.
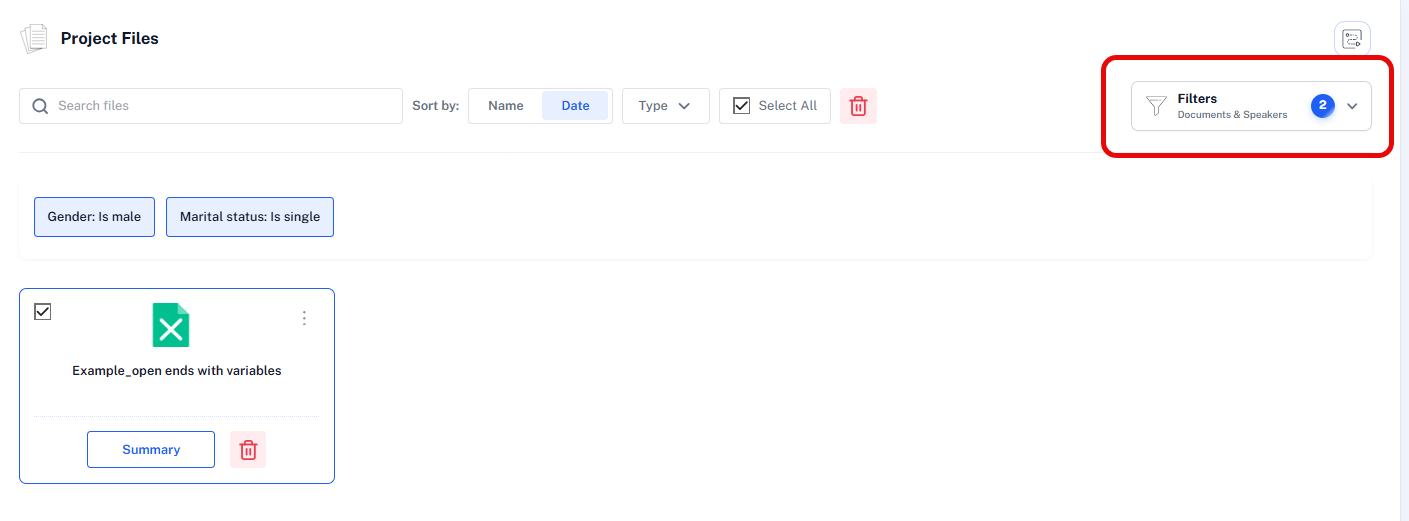
A further example is:
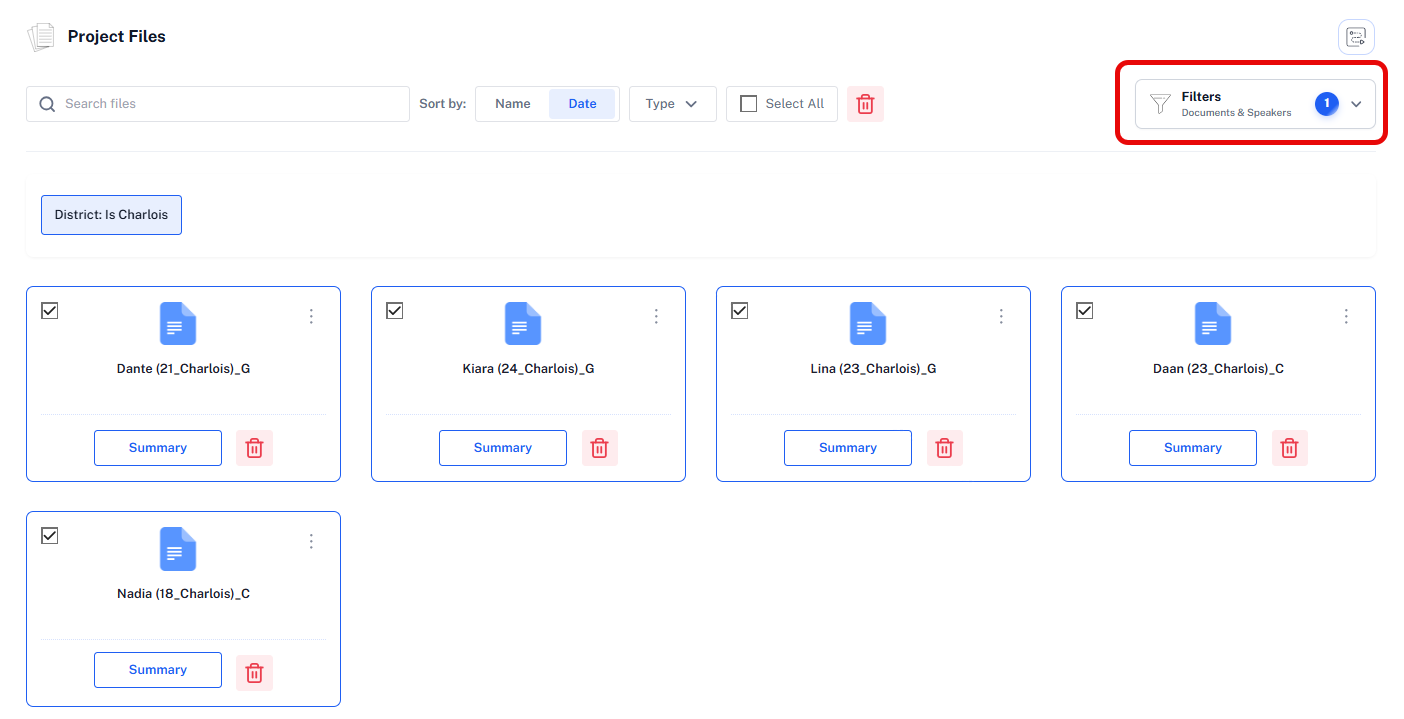
Removing a Filter
Removing an active filter is straightforward.
- Click the Filters button to see whether a Document Filter or Respondent Filter is currently active.
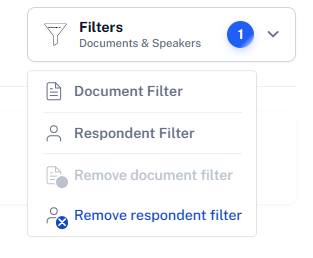
To remove a filter, click on either or both in case you have set a document and a respondent filter:
- Remove document filter
- Remove respondent filter
Only the relevant removal option is active, depending on which type of filter has been applied. After removing the filter(s), all documents will be shown again.