
After logging in, you are taken to the dashboard.
- To create a new project, click Add New Project on the right side of the screen.
Over time, you may accumulate a larger number of projects. To locate a specific project more quickly, use the search field at the top of the dashboard and enter the project name.
The screenshot below also shows a user avatar. You can add or change your avatar in Settings. This is explained in the Settings section of the manual.
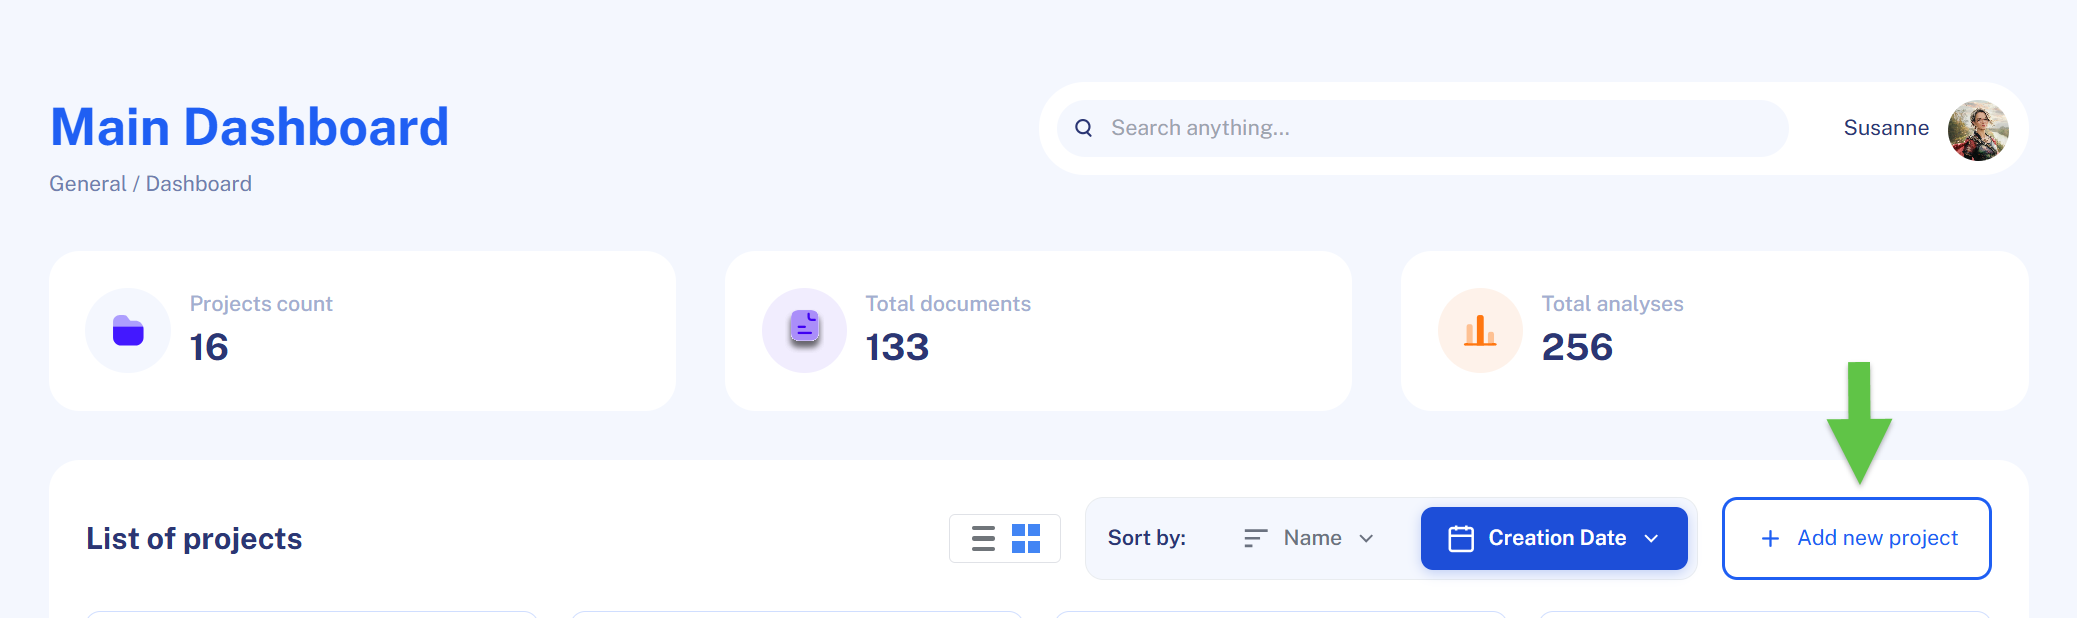
When you click Add new project, the project setup workflow starts. Everything that you enter from now no, will be information you provide for Q, your AI assistant. Based on the project name, you already tell it the general direction what your project is all about.
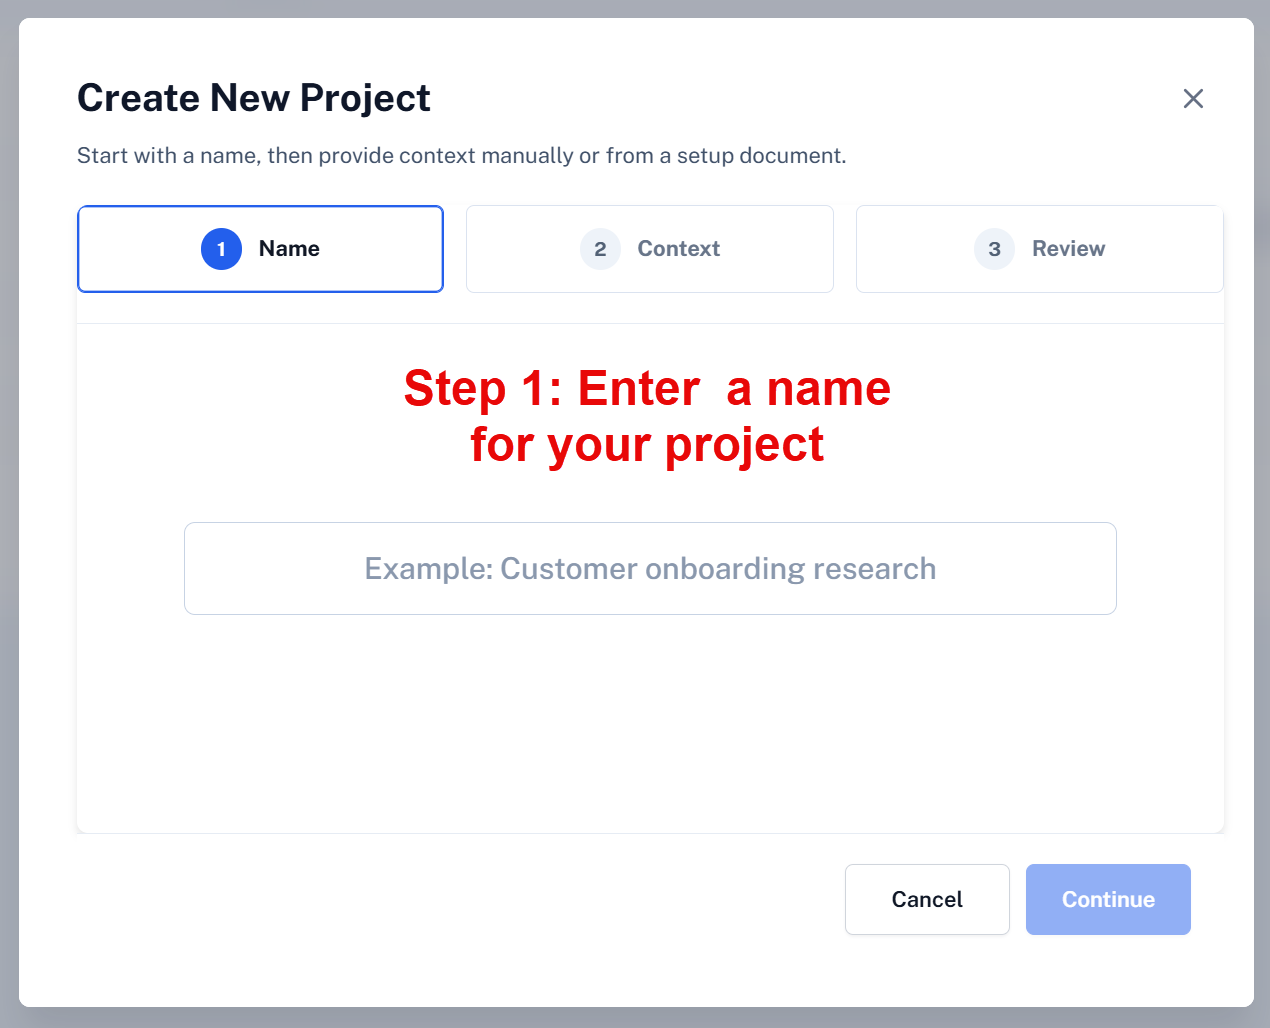
Step 1
- Enter a project name that meaningfully describes your project, for you, your colleagues and also your AI assistant. If you work longer with QInsights, you will accumulate multiple projects, and the name should allow you to easily find it.
- Once you enter a project name, click on Continue.
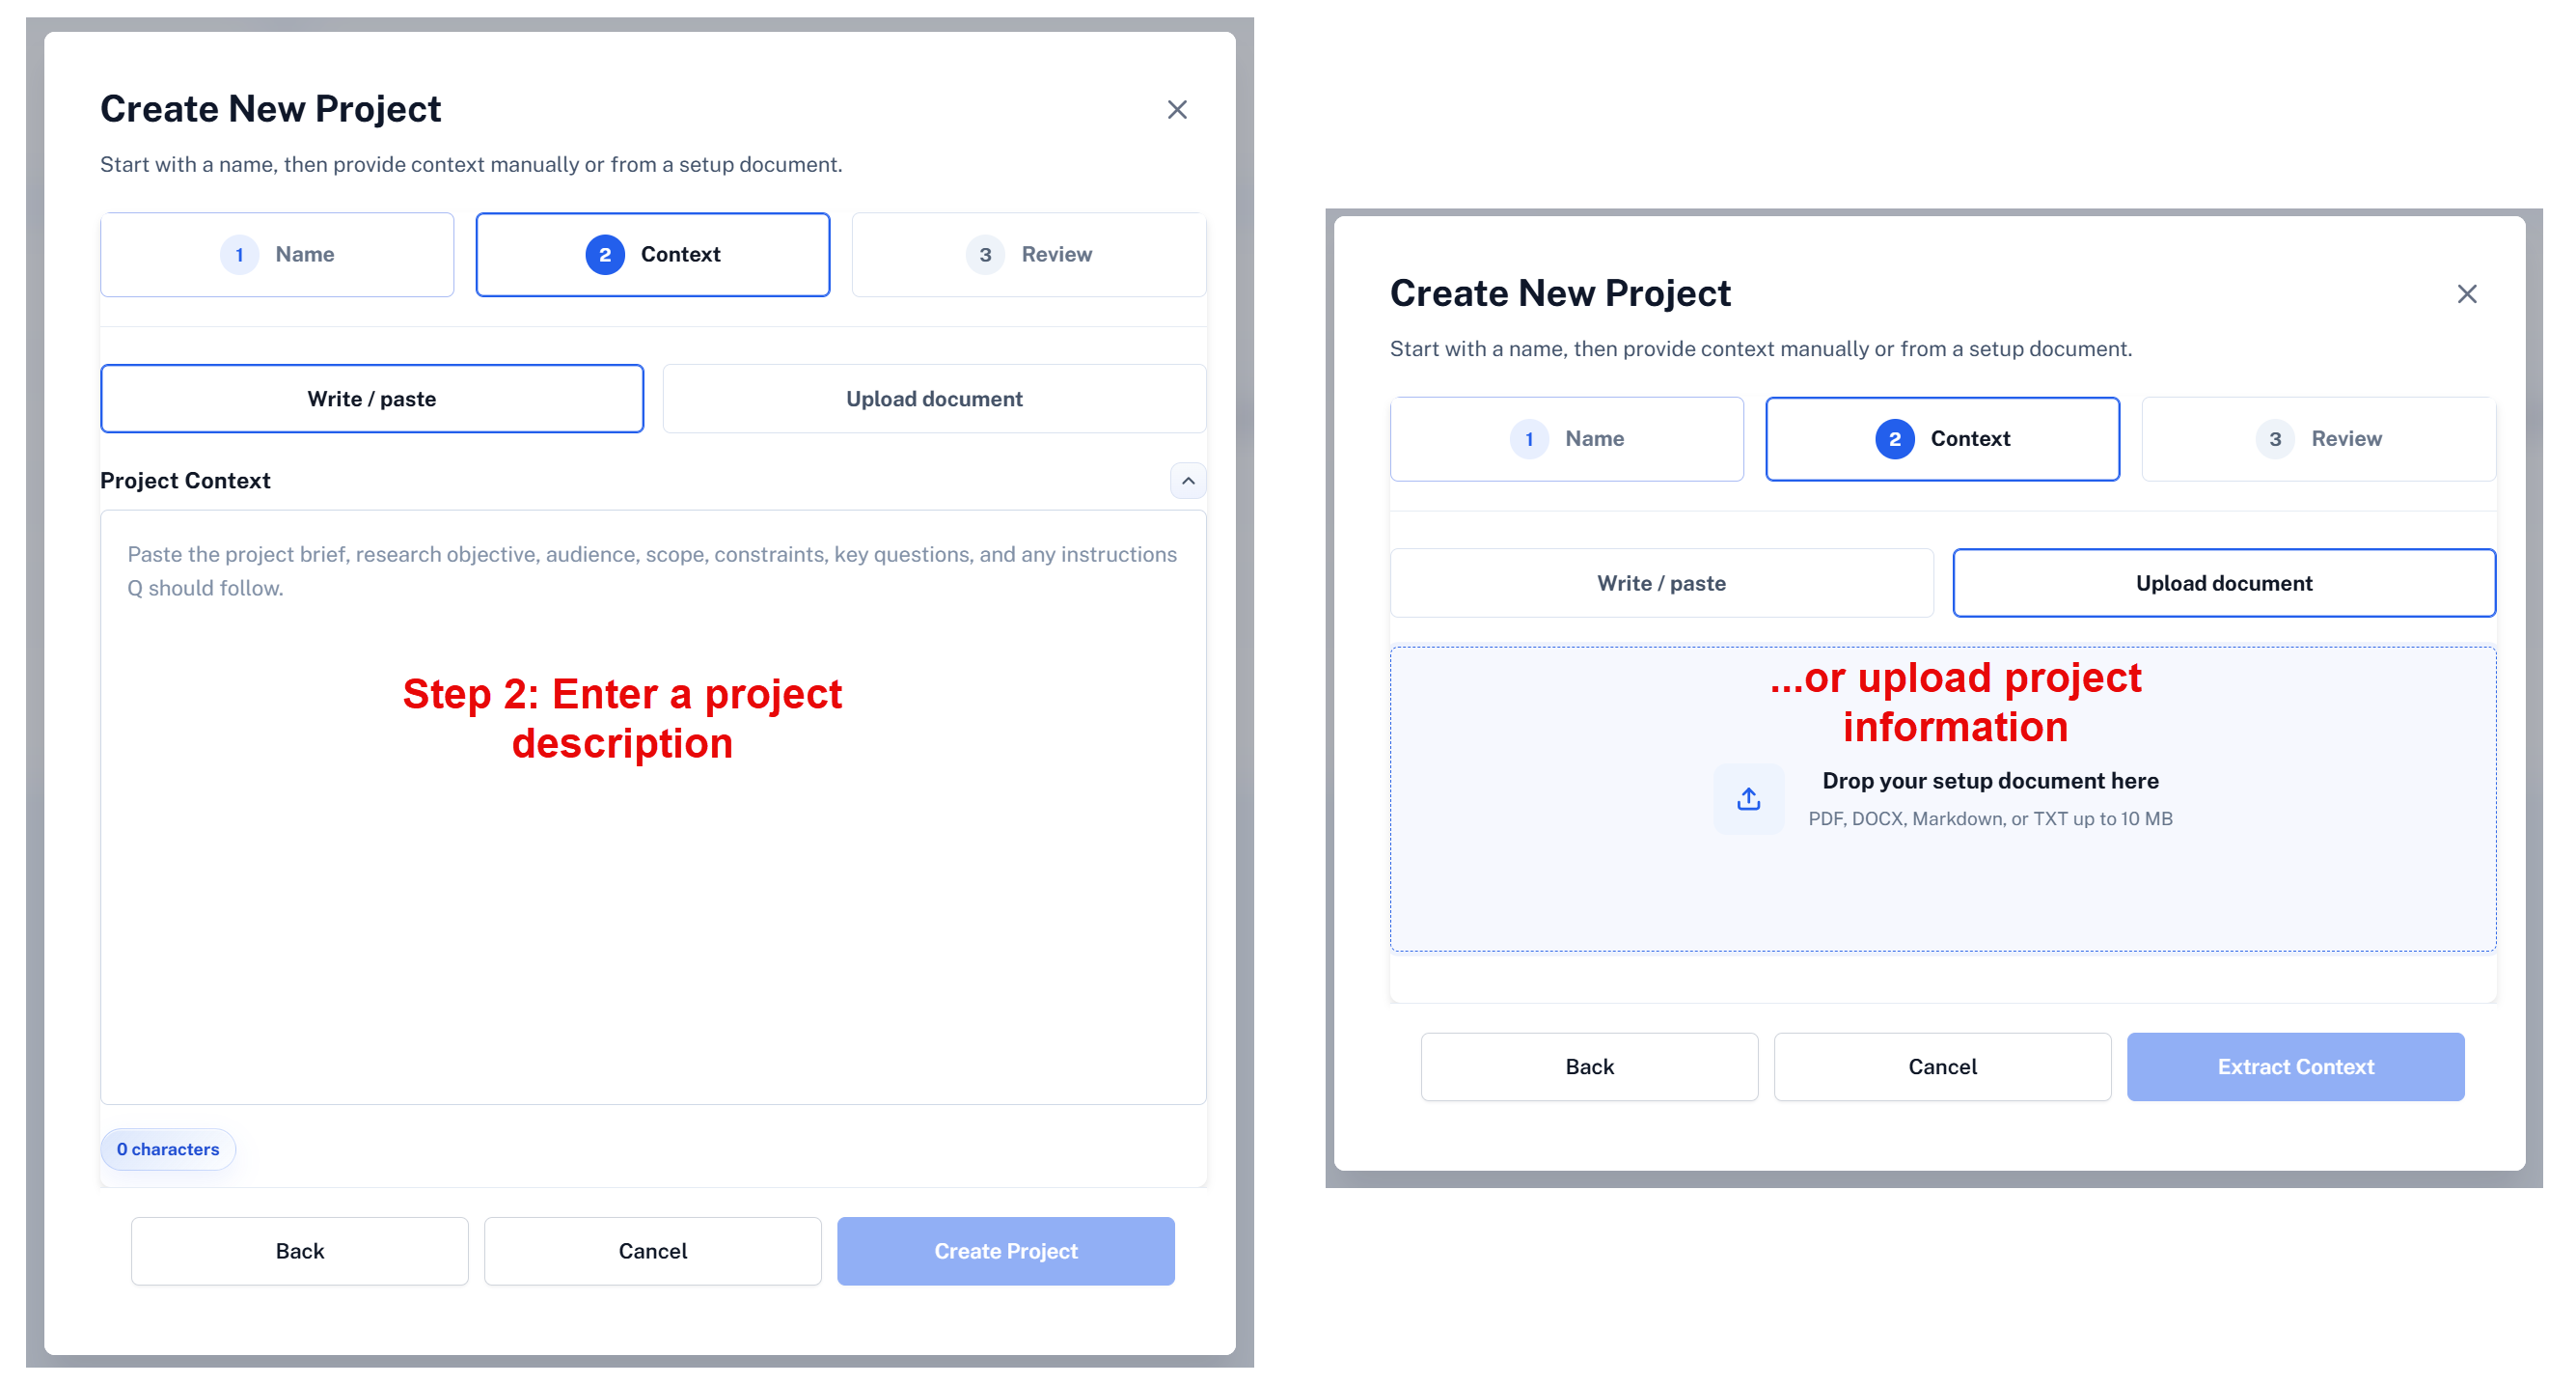
Step 2
- Your next step is to either enter a project description in the editor, or you upload a document.
You may already have a brief, a project proposal or similar the describes the aim of the project, the research questions, the goal of the research, the research participants or the people interviewed, the setting, etc.
Think of Q as a colleague joining your project. What would that colleague need to know to understand the project and support you effectively?
Keep in mind that an LLM has no embodied, lived experience and no direct knowledge of your real-world context. Include the background, circumstances, constraints, terminology, and practical details Q needs to provide relevant, high-quality assistance.
The project description can be changed whenever needed (see below). For the first analysis steps, we recommend keeping it descriptive. If you at an early stage already provide a framework or a theoretical model, Q’s answers might be already too specific. If you want more focus later on in the analysis, you can add further detail later.
Step 3
- When you enter a project description, click on Create Project.
- When you upload a document, click on Extract Context. Q is then reading the document and prepares a synthesis for your project. You can review what Q has prepared and make changes if necessary. After your review, click Create Project.
When the project opens, you see your project description on top:
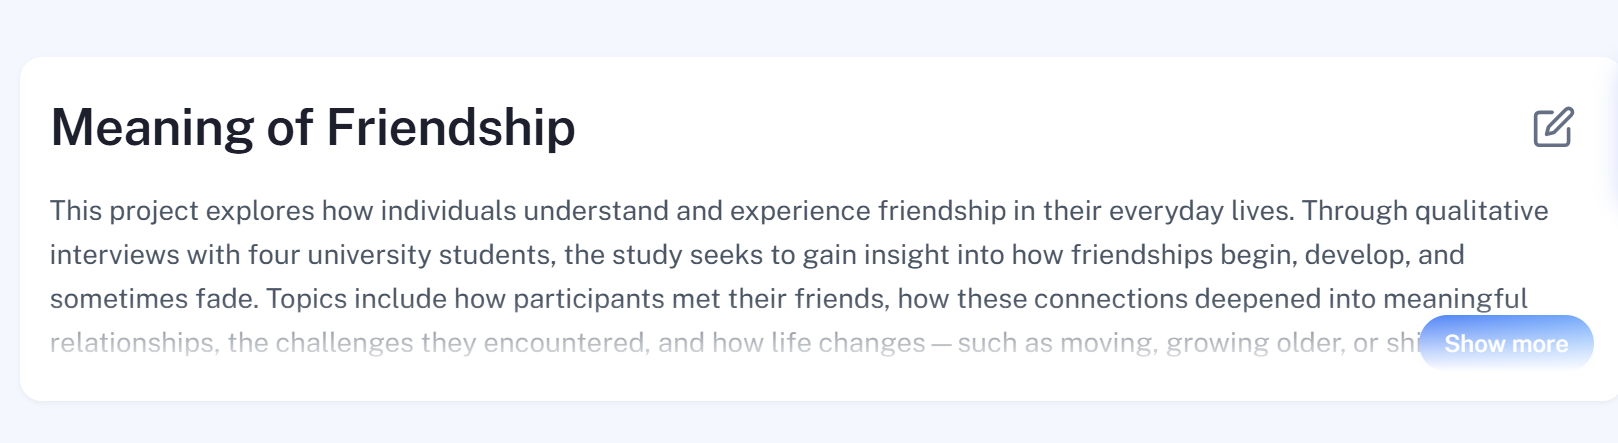
- If your description is a bit longer, click on Show more to see the full description.
- Click on the Edit button, to modify the description.