
All project management functions are available from the Dashboard. The dashboard provides an overview of your projects and shows the number of projects, documents and analyses in your account.
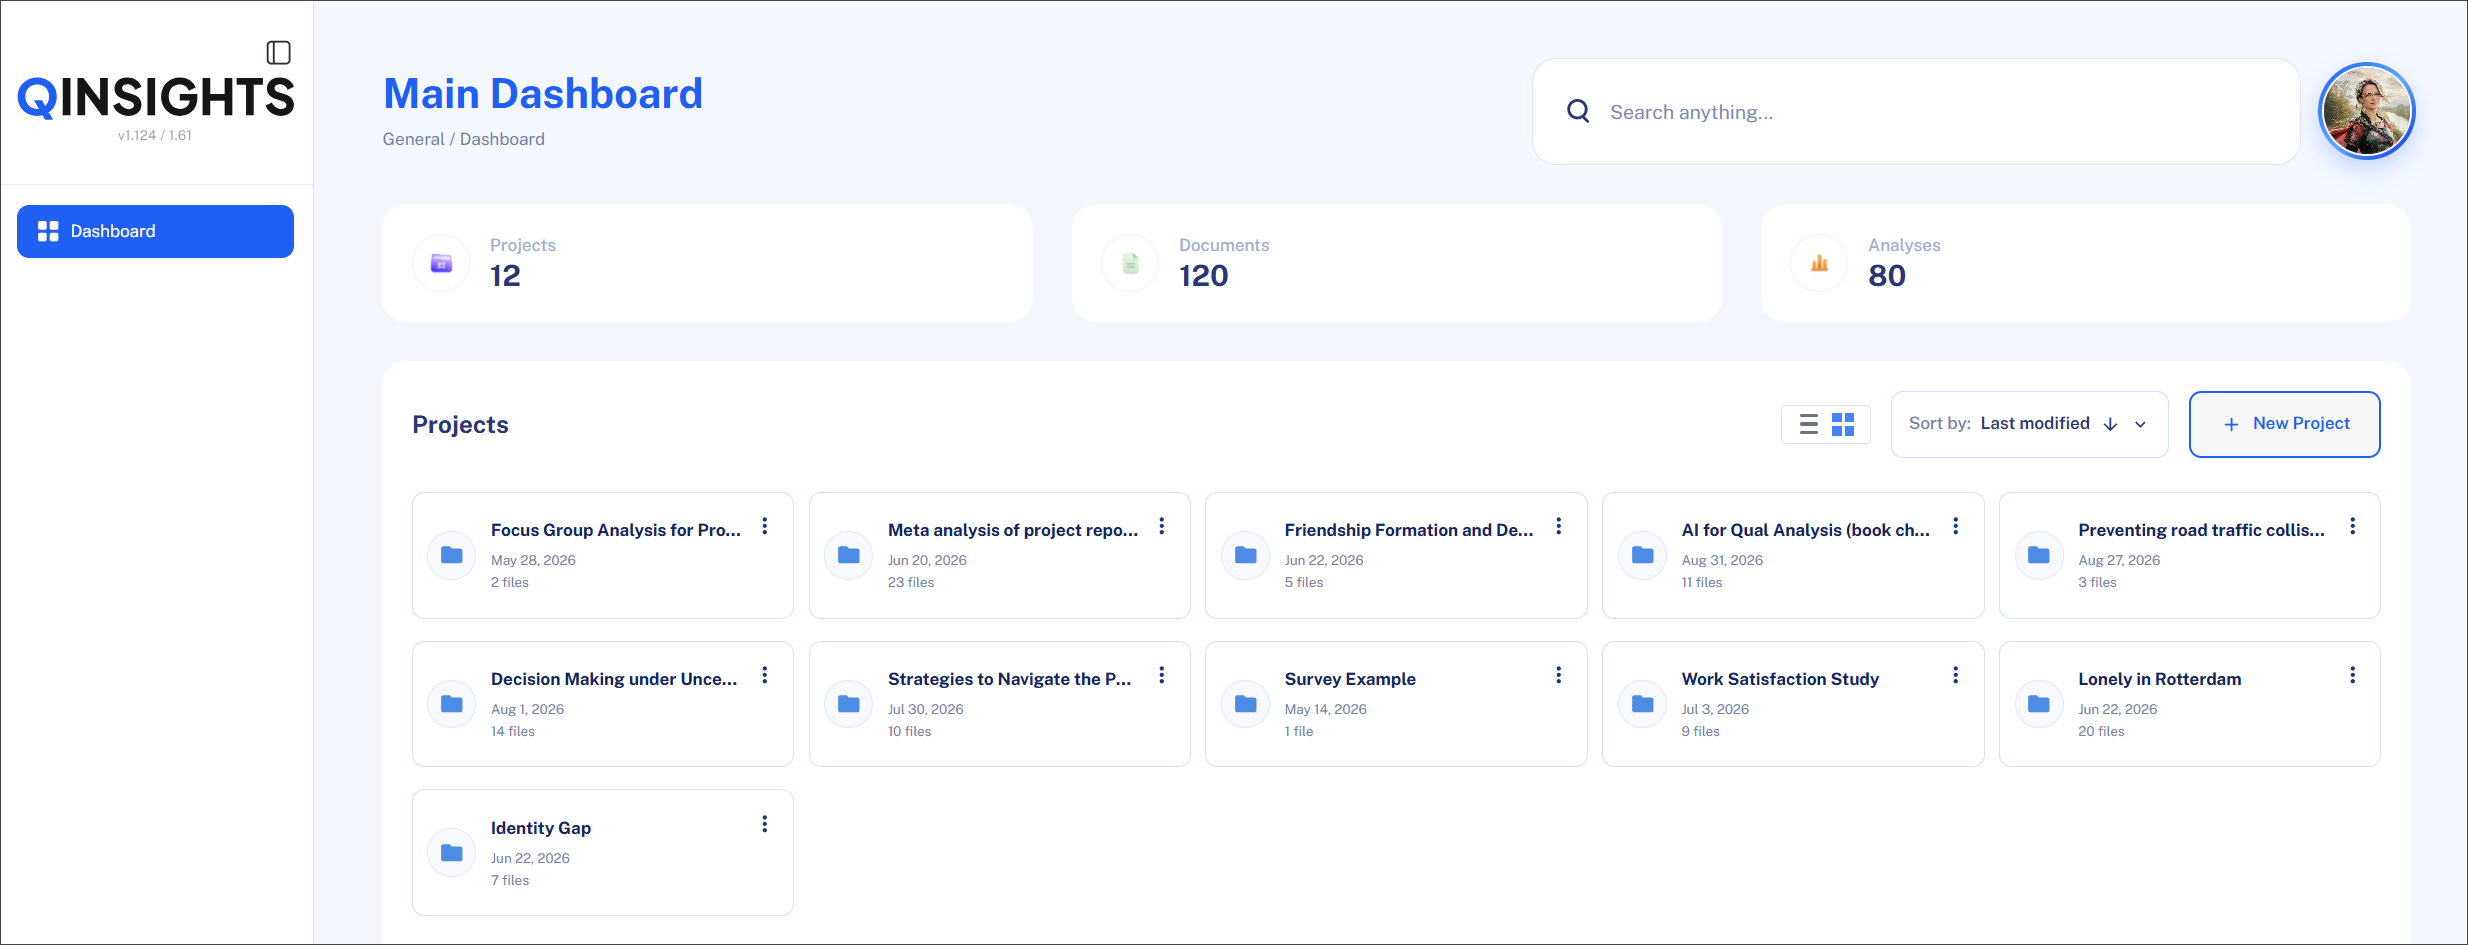
From here, you can:
- create a new project;
- open an existing project;
- rename a project;
- share a project;
- delete a project;
- sort projects, for example by the date they were last modified;
- Click Dashboard in this path to return to the project overview.
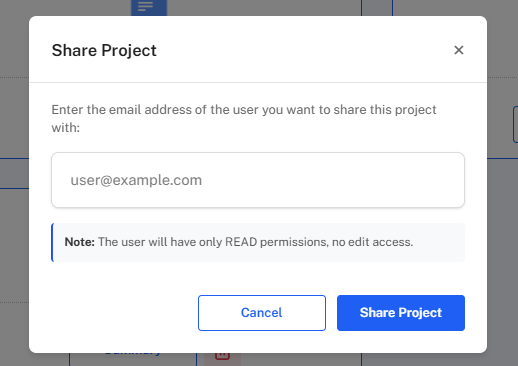
- Click on the "Share Project" button at the top left of your project space.

- Enter the email address your team member uses for their QInsights account and confirm by clicking "Share Project". The person will receive an email notification with access details.
- See all analyses saved in the archive
- Run new analyses and add results to the project
- Interact with the data just like you would
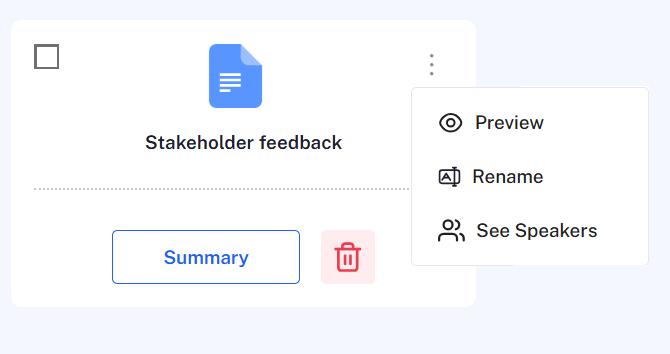
- Opening a preview of the document.
- Rename the document.
- See the speakers that have been identified in the document.
- Click the bin icon in the document card.
- Select the documents you want to delete.
- Click the bin icon in the action toolbar.
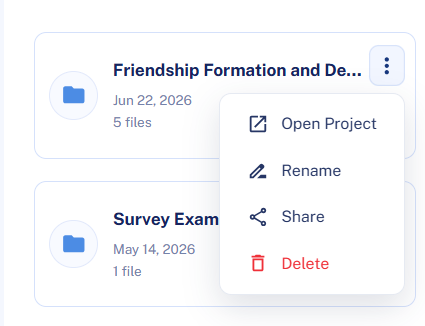
To access the project management options, click the three-dot menu in the upper-right corner of a project card. From here, select Open Project, Rename, Share, or Delete.
Opening and Navigating a Project
When you open a project, the project workspace is displayed.
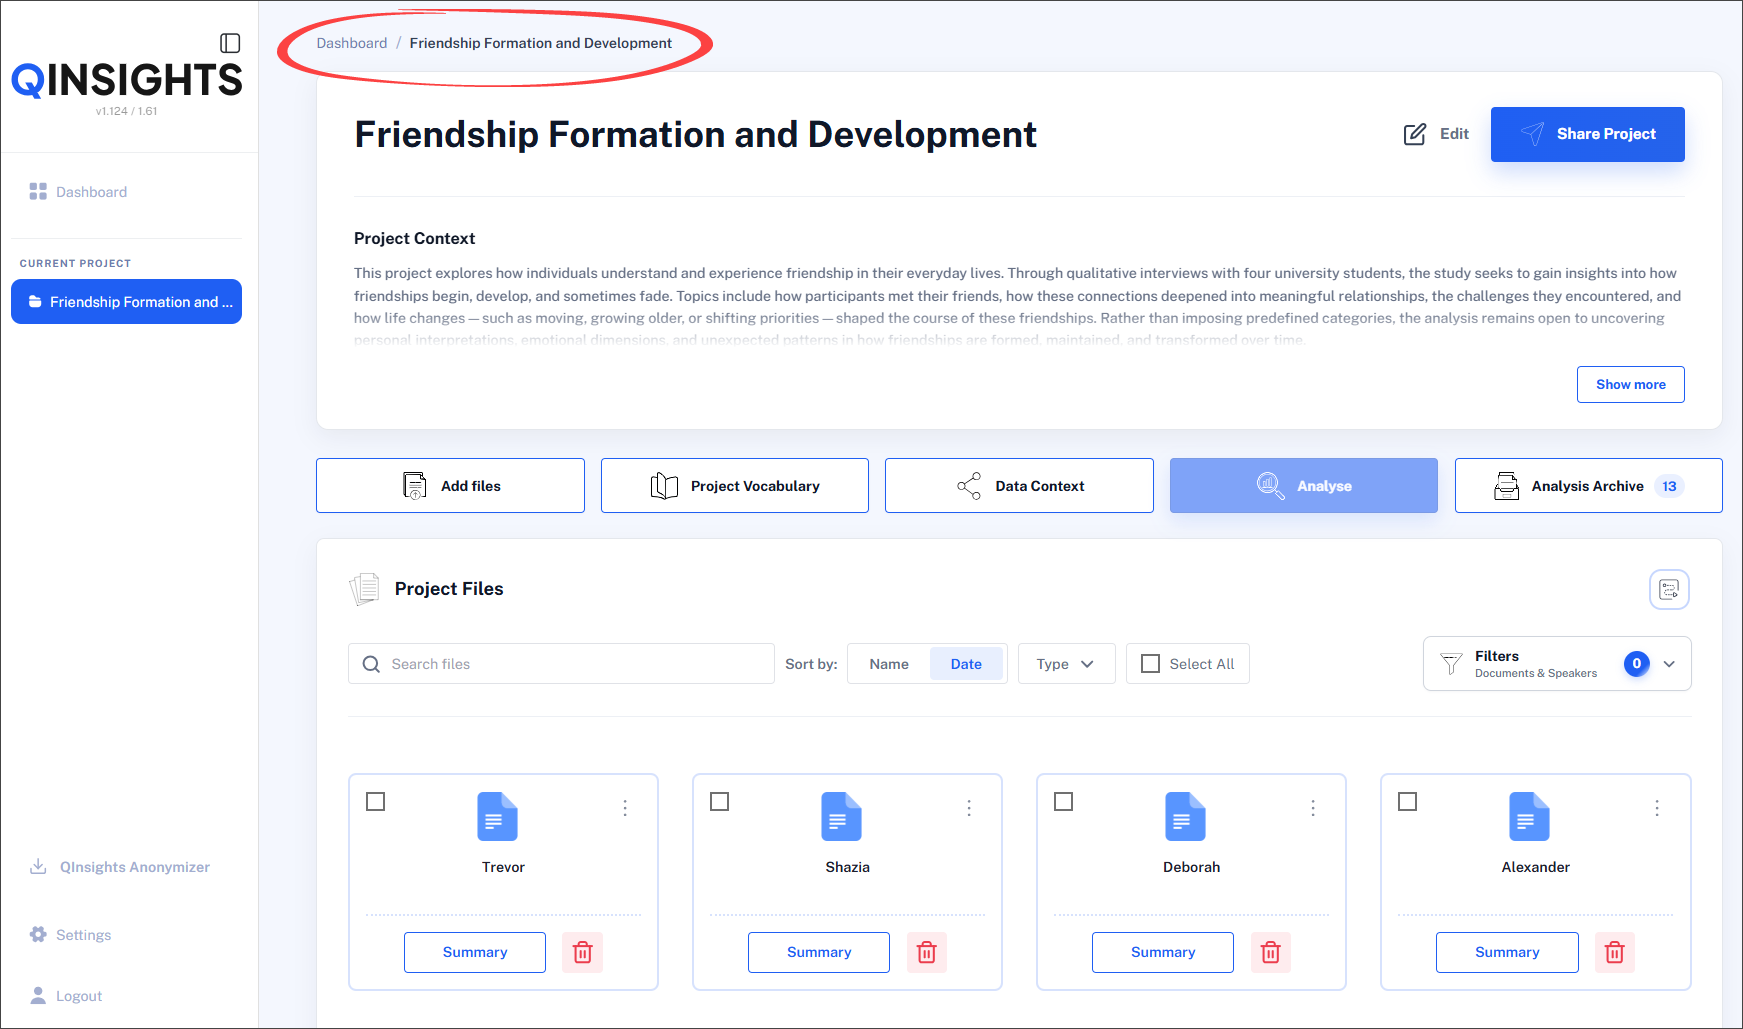
The left-hand navigation then shows the current project. Project-specific functions and content are available within the project workspace.
At the top of the workspace, a navigation path shows your current location, for example:
Dashboard / Friendship Formation and Development
Within the project, you can then access the available project functions, such as Add files, Project Vocabulary, Data Context, the project files, the Analysis options and the Analysis Archive.
Sharing a Project
QInsights allows you to collaborate on projects by sharing them with colleagues. This is especially useful when you're working in a research team or want to get a second opinion on your analysis.
To share a project,
Once shared, your team member can:
However, to protect the integrity of your dataset, they cannot delete any documents from the project.
This feature enables transparent collaboration, makes it easier to divide work, and helps ensure consistency across team-based research projects.
Document Cards
Each uploaded file is displayed as a document card in the project view. The document card shows basic information about the file and provides quick access to actions such as viewing a summary, deleting the file, or opening additional options from the three-dot menu.
Three-dot menu
When you click on the three dots, in a document card for Word, PDF or Excel files, you have the following options:
The document card for transcript has an addition option: Edit document, in case you want to make changes to your transcript (see Reviewing and editing transcripts for further details).
Deleting Project Documents
Deleting a single document:
Deleting multiple documents:
Sorting and Filtering Documents
You can change how document cards are displayed in the project view by either sorting them or filtering them. Sorting changes the order of the documents that are shown. Filtering changes which documents are shown. Sorting or filtering can help you find documents more quickly, especially in larger projects with many uploaded files.
The Type option does not change the order of the documents. Instead, it filters the project view by file format. For example, selecting PDF under Type shows only PDF documents. You can similarly filter for documents, spreadsheets, CSV files, audio files, or text files.
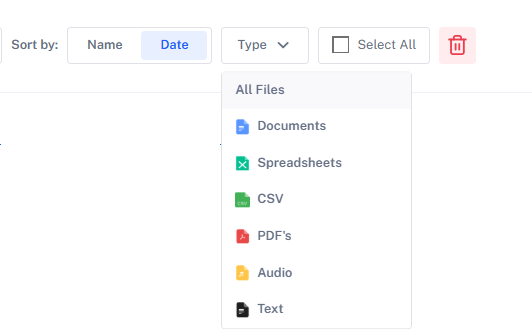
The following sort options are available:
Name (A–Z)
Displays documents in alphabetical order by file name. Click once to sort from A to Z. Click again to reverse the order from Z to A.
Date (Newest / Oldest)
Displays the most recently uploaded documents first. Click again to reverse the order and show the oldest documents first.
Sorting can help you find documents more quickly, especially in larger projects with many uploaded files.