
QInsights includes a Data Anonymizer that runs locally on your computer. It allows you to review and anonymize potentially identifying information before uploading documents to QInsights.
The current version supports:
- English, German, and Spanish.
- Support for Simplified Chinese and Traditional Chinese is currently being implemented.
At present, the Anonymizer works with Word and PDF files. Support for Excel files is planned and will follow in a later version.
Anonymize before uploading
Use the Anonymizer before uploading files when your documents contain personal or sensitive information that should not be included in the analysis environment. Because the tool runs locally, the original files remain on your computer while you review and modify the identified information.
What the Anonymizer can identify
The Anonymizer can detect up to 27 types of potentially identifying or sensitive information, including names, organisations, locations, email addresses, telephone numbers, identification numbers, job titles, health information, and other characteristics that may make a person identifiable. You decide which detected items should be anonymized, kept unchanged, or replaced with another value.
Using the Anonymizer with QInsights
The Anonymizer uses your QInsights login credentials but runs as a separate desktop application. After reviewing and anonymizing your files, save the modified versions and upload these files to your QInsights project.
The following sections explain how to download the application and work through the anonymization process step by step.
Download the Anonymizer
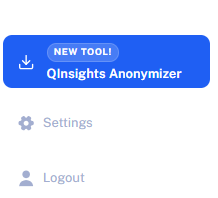
- Within QInsights, click on QInsights Anonymizer on the side bar.
- Click on Download desktop app in the following screen.
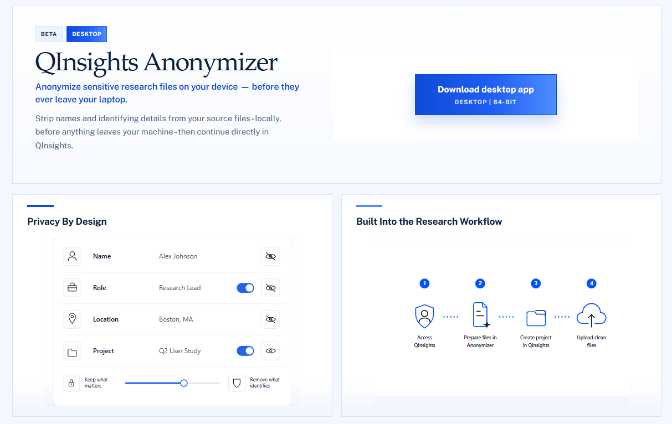
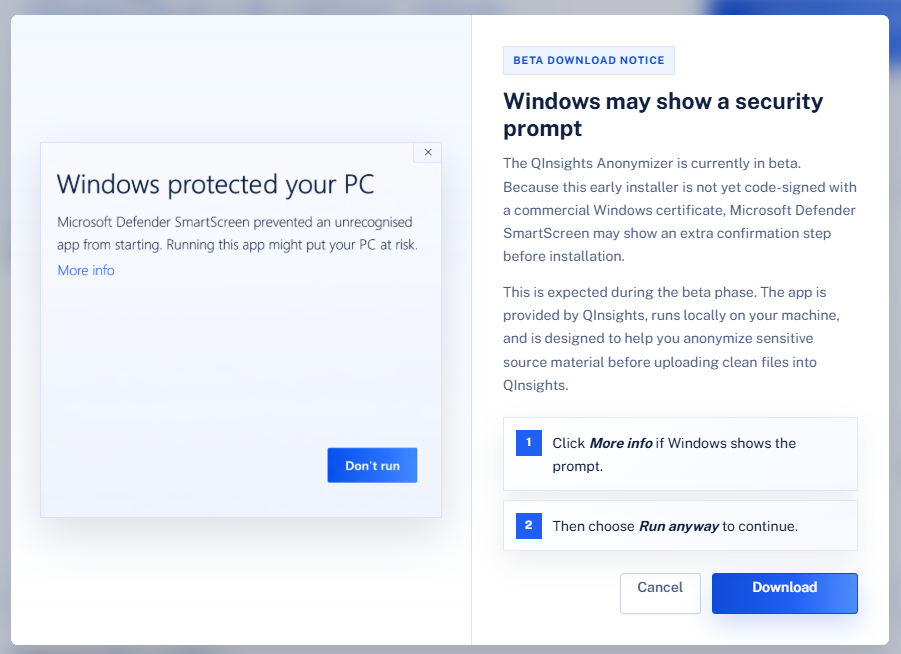
This brings you to the following screen, explaining what happens after you download and run the file. Windows may display a security warning. The application is currently in beta and has not yet been signed with a commercial Windows code-signing certificate. Windows therefore does not yet recognize QInsights as a verified publisher.
The Anonymizer runs locally on your computer and processes your files on your device.
- After double-clicking on the installation file, seeing this message, select More info, followed by Run anyway, to install and run the application.
How to Anonymize Your Data
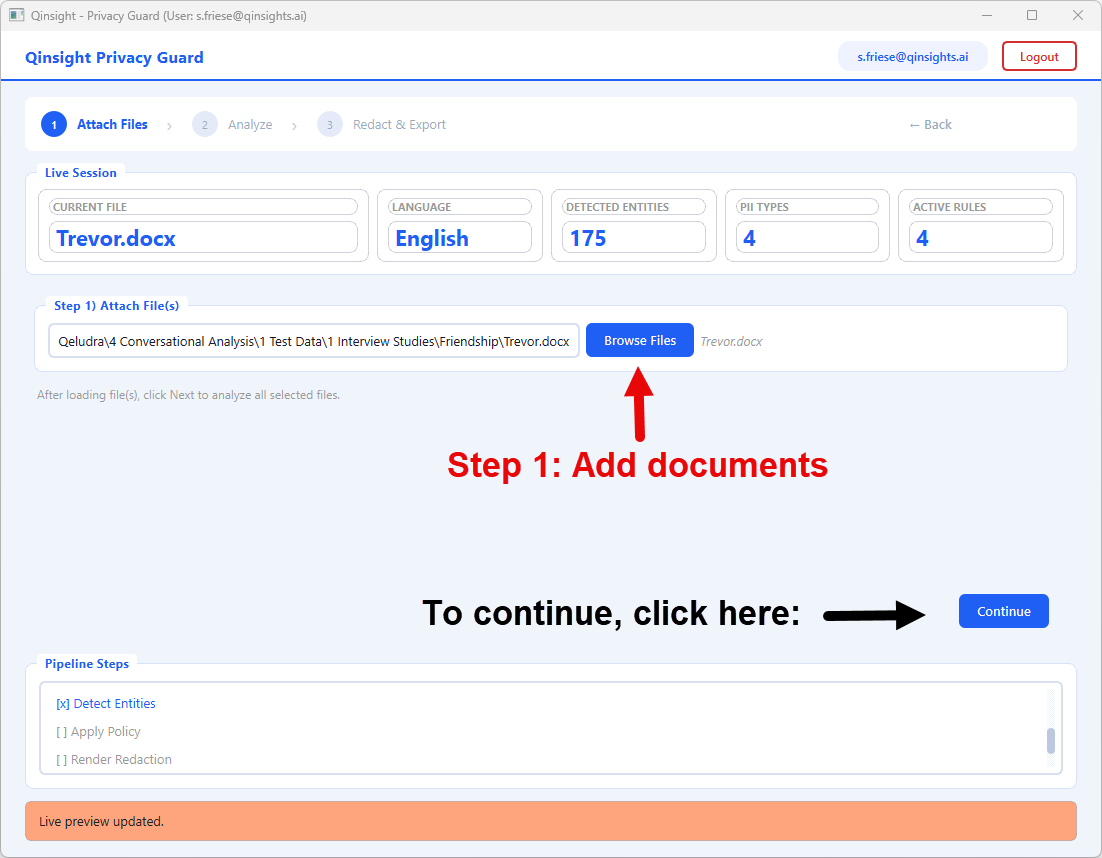
Step 1: Add Documents
- Open the QInsights Privacy Guard app.
- Click on Browse Files to add the documents you want to anonymize.
- Once documents are added, click Continue.
Step 2: Select Documents and Run Analysis
- Select the document you want to analyse and click Run Analysis.
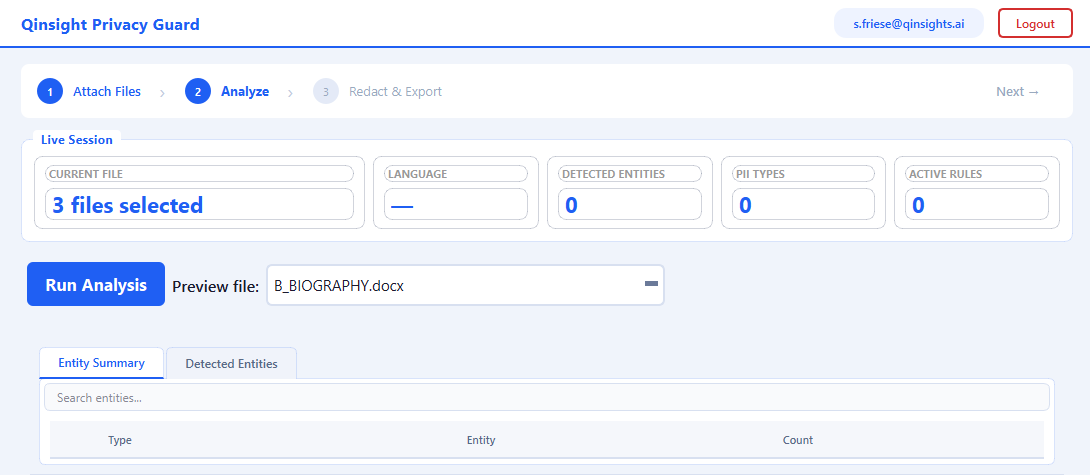
Next, you see a list of items that have been identified to be candidates for anonymization. As the tool is still in beta, there are still a number of items that might be overidentified. You will learn below how you can correct this.
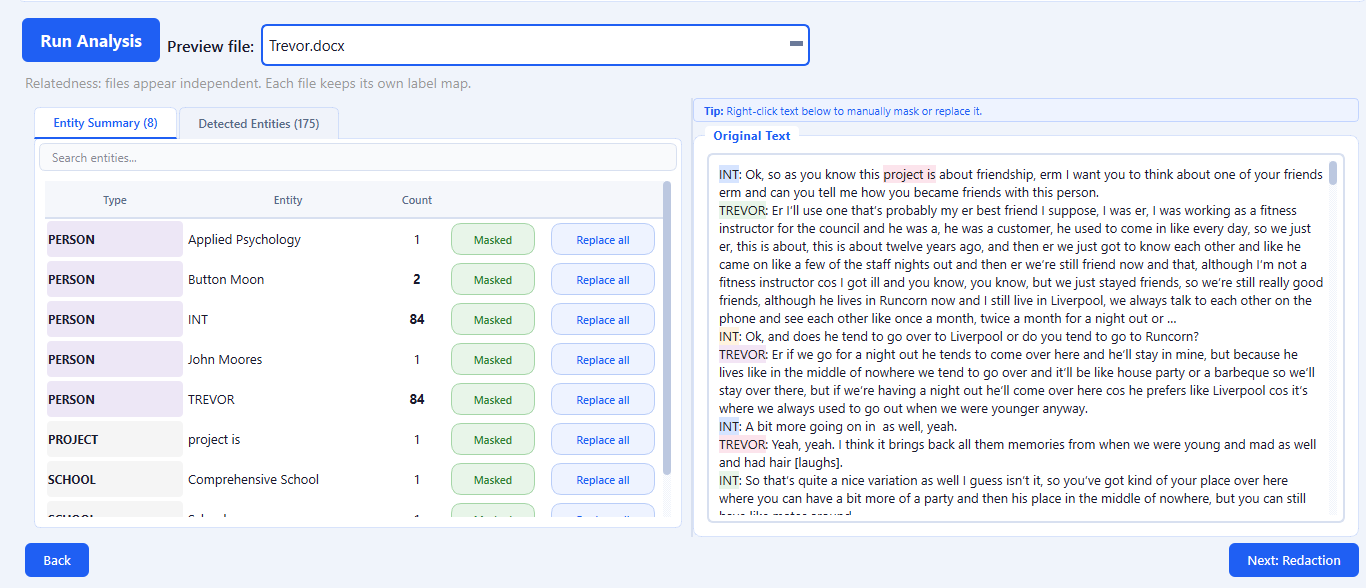
The QInsights Anonymizer can identify the following types of personal and sensitive information:
• Person names • Email addresses • Phone numbers • Postal addresses • Organisations • Social Security numbers • Passport numbers • Driving licence numbers • Account numbers | • Vehicle identifiers • Age • ZIP or postal codes • Job titles • Educational institutions • Health conditions • Ethnicity • Religion • Political views | • Sexual orientation • Biometric data • Genetic data • Trade union membership • Unique events • Rare characteristics • Membership of small groups • Family relationships • Other identification numbers or IDs |
Step 3: Check the Identified Entities and Modify as Needed
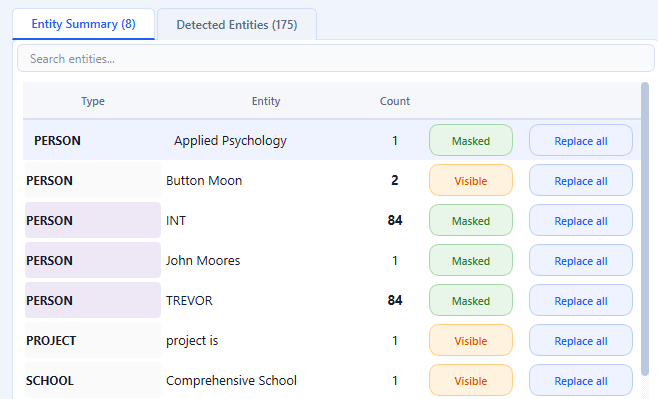
Not masking an entity because it has been wrongly classified as sensitive:
- Click on Masked. The button then changes to Visible.
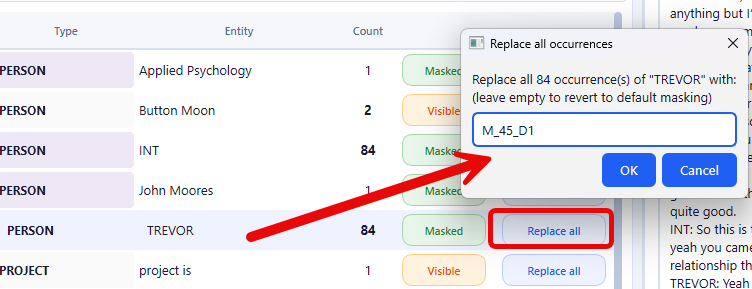
Changing the place holder, e.g. from [Person 1] to another name you want to use:
- Click on Replace with and change the name.
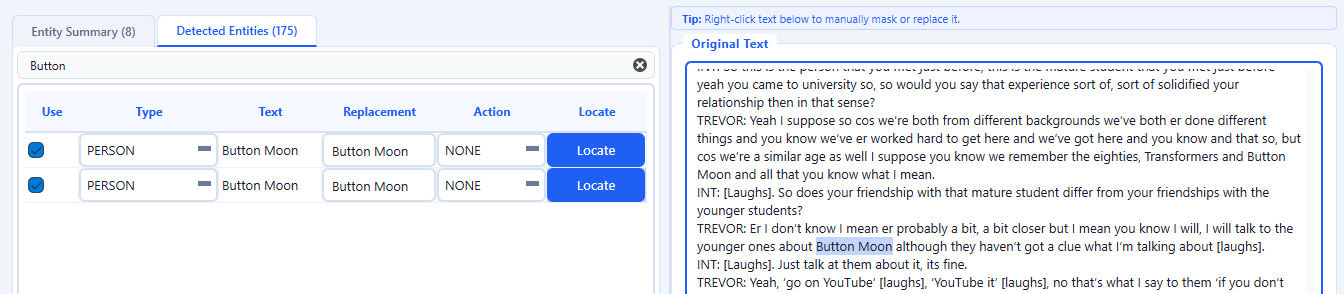
Verifying a detected entity in context:
- Select Detected Entities and type identified text into the search field.
- Next, click on Locate to see it in the context of the document.
- Decide whether you want to mask it or not.
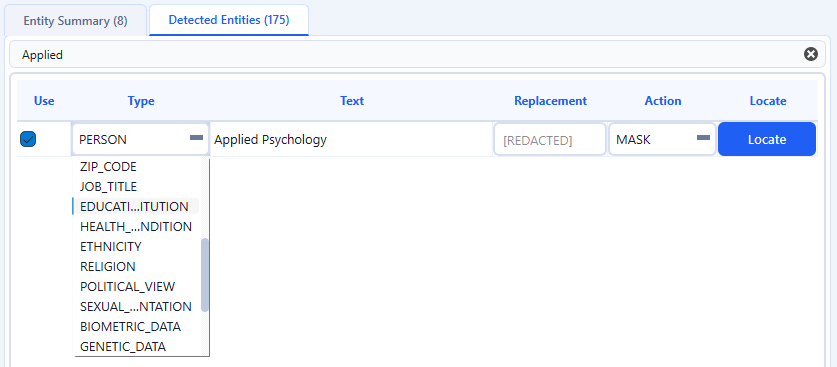
Changing the entity type used for anonymization
- Select Detected Entities and type the identified text into the search field.
- Next, click on Type field and select the appropriate type from the drop down.
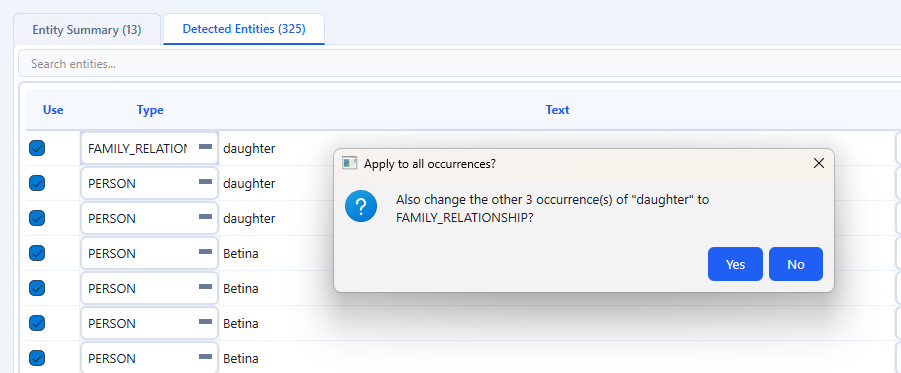
If there is multiple instance of the same text, you will be asked whether all instances should be changed to the new type:
Step 4: Reduction
- Once you have made all necessary changes, click on Next: Reduction at the left-hand side of the window.

- On the next screen, click: Run Reduction
Step 5: Save Output & Report
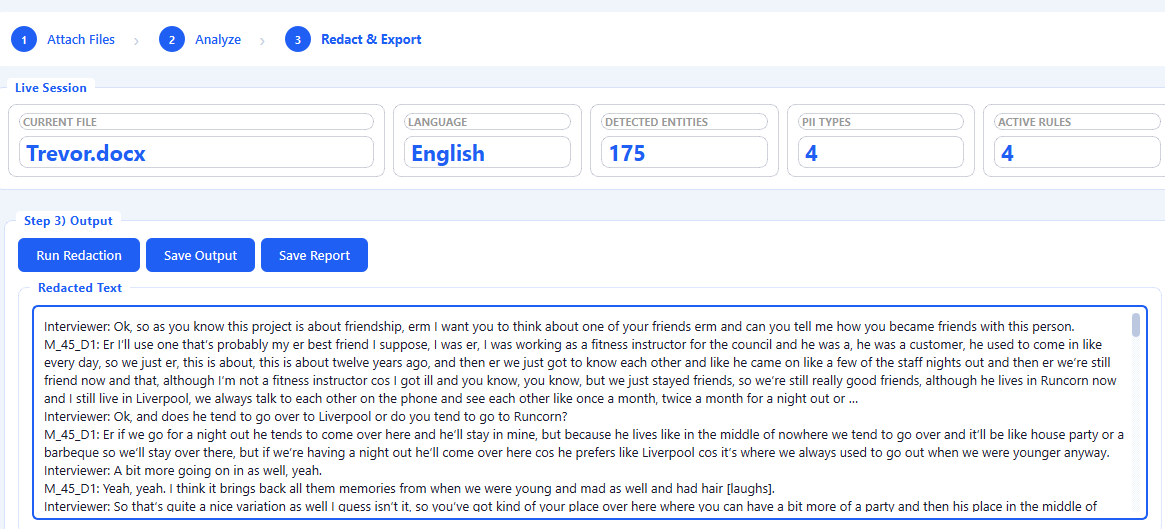
- When you click on Save Output, the redacted document is saved under its original name with the addition: _redacted, e.g. Trevor: _redacted.docx.
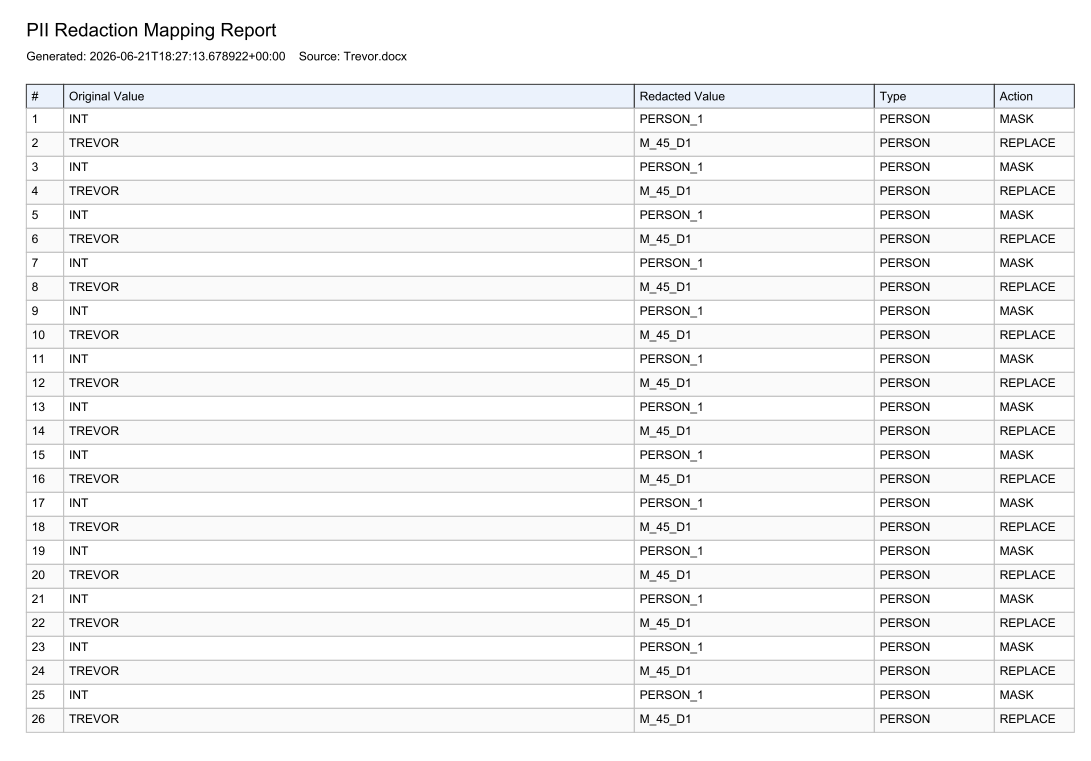
You see in the preview, that INT has been replaced with ‘Interviewer’ and Trevor with ‘M_45_D1’.
The report shows where each identified entity occurred and what it was replaced with. If you retain this report, the data are only pseudonymized because the replacements can still be traced back to the original personally identifiable information. For true anonymization, this link must no longer exist.
To work on the next document, click Back, select the next document from the dropdown and start the process again until all documents are anonymized.
For further information on how you best prepare your data for analysis, read the next chapter.